Product SiteDocumentation Site

Fedora 20

Installation Guide

Installing Fedora 20 on 32 and 64-bit Intel-compatible systems and ARM systems

Fedora Documentation Team

Fedora Documentation Project

Legal Notice

Copyright © 2014 Red Hat, Inc. and others.
The text of and illustrations in this document are licensed by Red Hat under a Creative Commons Attribution–Share Alike 3.0 Unported license ("CC-BY-SA"). An explanation of CC-BY-SA is available at http://creativecommons.org/licenses/by-sa/3.0/. The original authors of this document, and Red Hat, designate the Fedora Project as the "Attribution Party" for purposes of CC-BY-SA. In accordance with CC-BY-SA, if you distribute this document or an adaptation of it, you must provide the URL for the original version.
Red Hat, as the licensor of this document, waives the right to enforce, and agrees not to assert, Section 4d of CC-BY-SA to the fullest extent permitted by applicable law.
Red Hat, Red Hat Enterprise Linux, the Shadowman logo, JBoss, MetaMatrix, Fedora, the Infinity Logo, and RHCE are trademarks of Red Hat, Inc., registered in the United States and other countries.
For guidelines on the permitted uses of the Fedora trademarks, refer to https://fedoraproject.org/wiki/Legal:Trademark_guidelines.
Linux® is the registered trademark of Linus Torvalds in the United States and other countries.
Java® is a registered trademark of Oracle and/or its affiliates.
XFS® is a trademark of Silicon Graphics International Corp. or its subsidiaries in the United States and/or other countries.
MySQL® is a registered trademark of MySQL AB in the United States, the European Union and other countries.
All other trademarks are the property of their respective owners.

Abstract

This manual explains how to boot the Fedora installation program, Anaconda, and how to install Fedora 20 on 32 and 64-bit AMD and Intel systems and on ARM systems. It also covers advanced installation methods such as automated Kickstart installations, booting the installation from a network location, remote access to the installation system using VNC, and system upgrades from previous versions of Fedora. It also describes common post-installation tasks and explains how to troubleshoot common issues related to the installation.
Preface
1. Document Conventions
1.1. Typographic Conventions
1.2. Pull-quote Conventions
1.3. Notes and Warnings
2. We Need Feedback!
3. Acknowledgments
1. Introduction
1.1. Background
1.1.1. About Fedora
1.1.2. Getting Additional Help
1.2. About This Document
1.2.1. Goals
1.2.2. Target Audience
I. Installing Fedora
2. Preparing for Installation
2.1. Supported Hardware
2.2. Upgrade or Install?
2.3. Gathering System Information
2.4. Downloading Boot and Installation Media
2.5. Choosing an Installation Method
2.6. Preparing Boot Media
2.7. Preparing Installation Sources
3. Booting the Installation
3.1. Booting from Local Media
3.2. Booting from a Network
3.3. The Boot Menu
3.3.1. The Boot Menu on BIOS-based AMD and Intel Systems
3.3.2. The Boot Menu on UEFI-based AMD and Intel Systems
3.3.3. The Boot Menu on ARM Systems
4. Installing Using Anaconda
4.1. Consoles and Logging During the Installation
4.1.1. Accessing Consoles
4.1.2. Saving Screenshots
4.1.3. Log Files
4.1.4. Remote Logging
4.2. Installing in Text Mode
4.3. Installing in the Graphical User Interface
4.3.1. Welcome Screen and Language Selection
4.3.2. Installation Summary
4.3.3. Date & Time
4.3.4. Keyboard Layout
4.3.5. Language Support
4.3.6. Installation Source
4.3.7. Software Selection
4.3.8. Installation Destination
4.3.9. Installation Destination - Specialized & Network Disks
4.3.10. Manual Partitioning
4.3.11. Network & Hostname
4.3.12. Root Password
4.3.13. Create User
5. After the Installation
5.1. Initial Setup
5.2. Firstboot
5.3. GNOME Initial Setup
6. Troubleshooting
6.1. Getting Help
6.1.1. Log Files Generated During the Installation
6.1.2. Transferring Log Files from the Installation System
6.2. Trouble Beginning the Installation
6.2.1. Problems with Booting into the Graphical Installation
6.2.2. Serial Console Not Detected
6.3. Trouble During the Installation
6.3.1. No Disks Detected
6.4. Problems After Installation
6.4.1. Are You Unable to Boot With Your RAID Card?
6.4.2. Trouble With the Graphical Boot Sequence
6.4.3. Booting into a Graphical Environment
6.4.4. No Graphical User Interface Present
6.4.5. X Server Crashing After User Logs In
6.4.6. Is Your RAM Not Being Recognized?
7. Next Steps
7.1. Common Post-installation Tasks
7.2. Other Technical Documentation
II. Advanced Installation Options
8. Boot Options
8.1. Configuring the Installation System at the Boot Menu
8.2. Available Boot Options
8.2.1. Specifying the Installation Source
8.2.2. Kickstart Boot Options
8.2.3. Console, Environment and Display Options
8.2.4. Network Boot Options
8.2.5. Advanced Installation Options
8.2.6. Enabling Remote Access Using VNC
8.2.7. Debugging and Troubleshooting
8.3. Deprecated Boot Options
8.4. Removed Boot Options
8.5. Using the Maintenance Boot Modes
8.5.1. Loading the Memory (RAM) Testing Mode
8.5.2. Verifying Boot Media
8.5.3. Booting Your Computer in Rescue Mode
9. Automating the Installation with Kickstart
9.1. How to Perform a Kickstart Installation
9.1.1. Creating a Kickstart File
9.1.2. Verifying the Kickstart File
9.1.3. Making the Kickstart File Available
9.1.4. Starting the Kickstart Installation
10. Setting Up an Installation Server
10.1. PXE Installation Overview
10.2. DHCP Server Configuration
10.3. Installing the tftp server
10.4. Providing and configuring bootloaders for PXE clients
10.5. Getting the kernel and initrd
10.6. Providing repositories
10.7. Advanced network installations with Cobbler
11. Installing Using VNC
11.1. Installing a VNC Viewer
11.2. Performing a VNC Installation
11.2.1. Choosing a VNC Installation Mode
11.2.2. Installing in VNC Direct Mode
11.2.3. Installing in VNC Connect Mode
11.3. Kickstart Considerations
11.4. Considerations for Headless Systems
12. Upgrading Your Current System
12.1. Automatic System Upgrade Using FedUp
12.2. Manual System Upgrade or Reinstallation
III. Technical Appendixes
A. Kickstart Syntax Reference
A.1. Installation Methods and Sources
A.1.1. device (optional) - Install Extra Device Drivers
A.1.2. driverdisk (optional) - Use a Driver Disk
A.1.3. install (required) - Configure Installation Method
A.1.4. mediacheck (optional) - Verify Installation Media Integrity
A.1.5. ostree - Install from an OSTree
A.1.6. repo (optional) - Configure Additional Yum Repositories
A.2. Storage and Partitioning
A.2.1. autopart (optional) - Automatic Partitioning
A.2.2. bootloader (required) - Configure Boot Loader
A.2.3. btrfs (optional) - Create Btrfs Volume or Subvolume
A.2.4. clearpart (optional) - Remove All Existing Partitions
A.2.5. fcoe (optional) - Configure Fibre Channel Over Ethernet Devices
A.2.6. ignoredisk (optional) - Ignore Specified Disks
A.2.7. iscsi (optional) - Configure iSCSI Devices
A.2.8. iscsiname (optional) - Assign Name to iSCSI Device
A.2.9. logvol (optional) - Create LVM Logical Volume
A.2.10. part (required) - Create Physical Partition
A.2.11. raid (optional) - Create Software RAID
A.2.12. volgroup (optional) - Create LVM Volume Group
A.2.13. zerombr (optional) - Reinitialize Partition Tables
A.2.14. zfcp (optional) - Configure Fibre Channel Device
A.3. Network Configuration
A.3.1. firewall (optional) - Configure Firewall
A.3.2. network (optional) - Configure Network Interfaces
A.4. Console and Environment
A.4.1. keyboard (optional) - Configure Keyboard Layouts
A.4.2. lang (optional) - Configure Language During Installation
A.4.3. services (optional) - Configure Services
A.4.4. skipx (optional) - Do Not Configure X Window System
A.4.5. timezone (optional) - Configure Time Zone
A.4.6. xconfig (optional) - Configure X Window System
A.5. Users, Groups and Authentication
A.5.1. auth or authconfig (optional) - Configure Authentication
A.5.2. group (optional) - Create User Group
A.5.3. realm (optional) - Join an Active Directory or IPA Domain
A.5.4. rootpw (required) - Set Root Password
A.5.5. selinux (optional) - Configure SELinux
A.5.6. user (optional) - Create User Account
A.6. Installation Environment
A.6.1. autostep (optional) - Go Through Every Screen
A.6.2. cmdline (optional) - Perform Installation in Command Line Mode
A.6.3. graphical (optional) - Perform Installation in Graphical Mode
A.6.4. logging (optional) - Configure Error Logging During Installation
A.6.5. rescue (optional) - Rescue Mode
A.6.6. sshpw (optional) - Restrict ssh Access During Installation
A.6.7. text (optional) - Perform Installation in Text Mode
A.6.8. unsupported_hardware (optional) - Suppress Unsupported Hardware Alerts
A.6.9. vnc (optional) - Configure VNC Access
A.7. After the Installation
A.7.1. eula (optional) - Accept the License Agreement
A.7.2. firstboot (optional) - Enable or Disable Initial Setup
A.7.3. halt (optional) - Halt System After Installation
A.7.4. poweroff (optional) - Power Off After Installation
A.7.5. reboot (optional) - Reboot After Installation
A.7.6. shutdown (optional) - Shut Down After Installation
A.8. %include (optional) - Include Contents of Another File
A.9. %ksappend (optional) - Append Contents of Another File
A.10. %packages (required) - Package Selection
A.11. %pre (optional) - Pre-installation Script
A.12. %post (optional) - Post-installation Script
A.13. Example Kickstart Configurations
A.13.1. Advanced Partitioning Example
A.13.2. Example Pre-installation Script
A.13.3. Example Post-installation Script
B. Revision History
Index

Preface

1. Document Conventions

This manual uses several conventions to highlight certain words and phrases and draw attention to specific pieces of information.
In PDF and paper editions, this manual uses typefaces drawn from the Liberation Fonts set. The Liberation Fonts set is also used in HTML editions if the set is installed on your system. If not, alternative but equivalent typefaces are displayed. Note: Red Hat Enterprise Linux 5 and later include the Liberation Fonts set by default.

1.1. Typographic Conventions

Four typographic conventions are used to call attention to specific words and phrases. These conventions, and the circumstances they apply to, are as follows.
Mono-spaced Bold
Used to highlight system input, including shell commands, file names and paths. Also used to highlight keys and key combinations. For example:
To see the contents of the file my_next_bestselling_novel in your current working directory, enter the cat my_next_bestselling_novel command at the shell prompt and press Enter to execute the command.
The above includes a file name, a shell command and a key, all presented in mono-spaced bold and all distinguishable thanks to context.
Key combinations can be distinguished from an individual key by the plus sign that connects each part of a key combination. For example:
Press Enter to execute the command.
Press Ctrl+Alt+F2 to switch to a virtual terminal.
The first example highlights a particular key to press. The second example highlights a key combination: a set of three keys pressed simultaneously.
If source code is discussed, class names, methods, functions, variable names and returned values mentioned within a paragraph will be presented as above, in mono-spaced bold. For example:
File-related classes include filesystem for file systems, file for files, and dir for directories. Each class has its own associated set of permissions.
Proportional Bold
This denotes words or phrases encountered on a system, including application names; dialog-box text; labeled buttons; check-box and radio-button labels; menu titles and submenu titles. For example:
Choose SystemPreferencesMouse from the main menu bar to launch Mouse Preferences. In the Buttons tab, select the Left-handed mouse check box and click Close to switch the primary mouse button from the left to the right (making the mouse suitable for use in the left hand).
To insert a special character into a gedit file, choose ApplicationsAccessoriesCharacter Map from the main menu bar. Next, choose SearchFind… from the Character Map menu bar, type the name of the character in the Search field and click Next. The character you sought will be highlighted in the Character Table. Double-click this highlighted character to place it in the Text to copy field and then click the Copy button. Now switch back to your document and choose EditPaste from the gedit menu bar.
The above text includes application names; system-wide menu names and items; application-specific menu names; and buttons and text found within a GUI interface, all presented in proportional bold and all distinguishable by context.
Mono-spaced Bold Italic or Proportional Bold Italic
Whether mono-spaced bold or proportional bold, the addition of italics indicates replaceable or variable text. Italics denotes text you do not input literally or displayed text that changes depending on circumstance. For example:
To connect to a remote machine using ssh, type ssh username@domain.name at a shell prompt. If the remote machine is example.com and your username on that machine is john, type ssh john@example.com.
The mount -o remount file-system command remounts the named file system. For example, to remount the /home file system, the command is mount -o remount /home.
To see the version of a currently installed package, use the rpm -q package command. It will return a result as follows: package-version-release.
Note the words in bold italics above: username, domain.name, file-system, package, version and release. Each word is a placeholder, either for text you enter when issuing a command or for text displayed by the system.
Aside from standard usage for presenting the title of a work, italics denotes the first use of a new and important term. For example:
Publican is a DocBook publishing system.

1.2. Pull-quote Conventions

Terminal output and source code listings are set off visually from the surrounding text.
Output sent to a terminal is set in mono-spaced roman and presented thus:
books        Desktop   documentation  drafts  mss    photos   stuff  svn
books_tests  Desktop1  downloads      images  notes  scripts  svgs
Source-code listings are also set in mono-spaced roman but add syntax highlighting as follows:
package org.jboss.book.jca.ex1;

import javax.naming.InitialContext;

public class ExClient
{
   public static void main(String args[]) 
       throws Exception
   {
      InitialContext iniCtx = new InitialContext();
      Object         ref    = iniCtx.lookup("EchoBean");
      EchoHome       home   = (EchoHome) ref;
      Echo           echo   = home.create();

      System.out.println("Created Echo");

      System.out.println("Echo.echo('Hello') = " + echo.echo("Hello"));
   }
}

1.3. Notes and Warnings

Finally, we use three visual styles to draw attention to information that might otherwise be overlooked.

Note

Notes are tips, shortcuts or alternative approaches to the task at hand. Ignoring a note should have no negative consequences, but you might miss out on a trick that makes your life easier.

Important

Important boxes detail things that are easily missed: configuration changes that only apply to the current session, or services that need restarting before an update will apply. Ignoring a box labeled “Important” will not cause data loss but may cause irritation and frustration.

Warning

Warnings should not be ignored. Ignoring warnings will most likely cause data loss.

2. We Need Feedback!

If you find a typographical error in this manual, or if you have thought of a way to make this manual better, we would love to hear from you! Please submit a report in Bugzilla: http://bugzilla.redhat.com/bugzilla/ against the product Fedora.
When submitting a bug report, be sure to mention the manual's identifier: install-guide
If you have a suggestion for improving the documentation, try to be as specific as possible when describing it. If you have found an error, please include the section number and some of the surrounding text so we can find it easily.

3. Acknowledgments

Certain portions of this text first appeared in the Red Hat Enterprise Linux Installation Guide, copyright © 2014 Red Hat, Inc. and others, published by Red Hat at https://access.redhat.com/documentation/en-US/Red_Hat_Enterprise_Linux/.

Chapter 1. Introduction

This guide covers installation of Fedora, a Linux distribution built on free and open source software. This manual helps you install Fedora on desktops, laptops, and servers. The installation system is easy to use even if you lack previous knowledge of Linux or computer networks. If you select default options, Fedora provides a complete desktop operating system, including productivity applications, Internet utilities, and desktop tools.
This document details the full range of installation options, including those that apply only in limited or unusual circumstances. Understanding of all topics described in this document is not necessary to successfully perform the installation in most cases.

1.1. Background

1.1.1. About Fedora

To find out more about Fedora, visit the Fedora Project Website. Other documentation describing additional topics related to Fedora is available at Fedora Documentation. Also see the Fedora Project Wiki.

1.1.2. Getting Additional Help

If you encounter any problems which are not described in documentation, you might get help from members of the community - developers, users, and others. There are many ways to get help: the Ask Fedora website, mailing lists, forums, or IRC. For a summary of available resources, see the Communicating and Getting Help page on the Fedora wiki.

1.2. About This Document

1.2.1. Goals

This guide helps a reader:
  • Understand how to locate the Fedora distribution online
  • Create configuration data that allows a computer to boot Fedora
  • Understand and interact with the Fedora installation program
  • Complete basic post-installation configuration of a Fedora system

Note

This guide does not cover use of Fedora. To learn how to use an installed Fedora system, see the other manuals available at Fedora Documentation.

1.2.2. Target Audience

This guide is intended for Fedora users of all levels of experience. However, it describes the installation process and its many options in far greater detail than most users are likely to require. You do not need to read and understand this entire document to install Fedora on a computer. This document is most likely to help experienced users perform advanced and unusual installations.

Part I. Installing Fedora

This part of the Fedora Installation Guide details the installation process itself, starting with the steps you must take to prepare for the installation, and ending with the steps you need to take immediately after the installation finishes and your system reboots for the first time. It also includes a section about troubleshooting common problems which may appear before, during or immediately after the installation.

Table of Contents

2. Preparing for Installation
2.1. Supported Hardware
2.2. Upgrade or Install?
2.3. Gathering System Information
2.4. Downloading Boot and Installation Media
2.5. Choosing an Installation Method
2.6. Preparing Boot Media
2.7. Preparing Installation Sources
3. Booting the Installation
3.1. Booting from Local Media
3.2. Booting from a Network
3.3. The Boot Menu
3.3.1. The Boot Menu on BIOS-based AMD and Intel Systems
3.3.2. The Boot Menu on UEFI-based AMD and Intel Systems
3.3.3. The Boot Menu on ARM Systems
4. Installing Using Anaconda
4.1. Consoles and Logging During the Installation
4.1.1. Accessing Consoles
4.1.2. Saving Screenshots
4.1.3. Log Files
4.1.4. Remote Logging
4.2. Installing in Text Mode
4.3. Installing in the Graphical User Interface
4.3.1. Welcome Screen and Language Selection
4.3.2. Installation Summary
4.3.3. Date & Time
4.3.4. Keyboard Layout
4.3.5. Language Support
4.3.6. Installation Source
4.3.7. Software Selection
4.3.8. Installation Destination
4.3.9. Installation Destination - Specialized & Network Disks
4.3.10. Manual Partitioning
4.3.11. Network & Hostname
4.3.12. Root Password
4.3.13. Create User
5. After the Installation
5.1. Initial Setup
5.2. Firstboot
5.3. GNOME Initial Setup
6. Troubleshooting
6.1. Getting Help
6.1.1. Log Files Generated During the Installation
6.1.2. Transferring Log Files from the Installation System
6.2. Trouble Beginning the Installation
6.2.1. Problems with Booting into the Graphical Installation
6.2.2. Serial Console Not Detected
6.3. Trouble During the Installation
6.3.1. No Disks Detected
6.4. Problems After Installation
6.4.1. Are You Unable to Boot With Your RAID Card?
6.4.2. Trouble With the Graphical Boot Sequence
6.4.3. Booting into a Graphical Environment
6.4.4. No Graphical User Interface Present
6.4.5. X Server Crashing After User Logs In
6.4.6. Is Your RAM Not Being Recognized?
7. Next Steps
7.1. Common Post-installation Tasks
7.2. Other Technical Documentation

Chapter 2. Preparing for Installation

This chapter describes the steps you need take before you begin the installation. Not every step must be strictly followed - for example, if you plan to use the default installation settings, you do not need to gather system information such as disk device labels/UUIDs or network information such as the system's IP address. However, you should still go through this chapter, as it also describes the available types of installation media and how to prepare boot media and installation sources.

2.1. Supported Hardware

TODO

2.2. Upgrade or Install?

If you already have Fedora installed and want to upgrade your installation to the current version, there are two basic ways to do so:
Automatic upgrade using FedUp
The preferred way to upgrade your system is an automatic upgrade using the FedUp utility. For information on performing an automatic upgrade, see Section 12.1, “Automatic System Upgrade Using FedUp”.
Manual upgrade
You can upgrade your Fedora installation manually instead of relying on FedUp. This involves booting the installer as if you were performing a clean installation, letting it detect your existing Fedora system, and overwriting the root partition while preserving data on other partitions and volumes. The same process can also be used to reinstall the system, if you need to. For detailed information, see Section 12.2, “Manual System Upgrade or Reinstallation”.

Warning

Always back up your data before performing an upgrade or reinstalling your system, no matter which method you choose.

2.3. Gathering System Information

TODO

2.4. Downloading Boot and Installation Media

TODO

2.5. Choosing an Installation Method

TODO

2.6. Preparing Boot Media

TODO

2.7. Preparing Installation Sources

TODO

Chapter 3. Booting the Installation

intro text

3.1. Booting from Local Media

text

3.2. Booting from a Network

text

3.3. The Boot Menu

text

3.3.1. The Boot Menu on BIOS-based AMD and Intel Systems

text

3.3.2. The Boot Menu on UEFI-based AMD and Intel Systems

text

3.3.3. The Boot Menu on ARM Systems

text

Chapter 4. Installing Using Anaconda

intro text

4.1. Consoles and Logging During the Installation

text

4.1.1. Accessing Consoles

text

4.1.2. Saving Screenshots

text

4.1.3. Log Files

text

4.1.4. Remote Logging

text

4.2. Installing in Text Mode

text

4.3. Installing in the Graphical User Interface

text

4.3.1. Welcome Screen and Language Selection

text

4.3.2. Installation Summary

text

4.3.3. Date & Time

text

4.3.4. Keyboard Layout

text

4.3.5. Language Support

text

4.3.6. Installation Source

text

4.3.7. Software Selection

text

4.3.8. Installation Destination

text

4.3.9. Installation Destination - Specialized & Network Disks

text

4.3.10. Manual Partitioning

text

4.3.11. Network & Hostname

text

4.3.12. Root Password

text

4.3.13. Create User

text

Chapter 5. After the Installation

intro text

5.1. Initial Setup

text

5.2. Firstboot

text

5.3. GNOME Initial Setup

text

Chapter 6. Troubleshooting

This chapter offers some pointers on how to get help when something goes wrong. It also discusses some common installation problems and their solutions.

6.1. Getting Help

There are many places on the internet which can help you when you encounter a problem not described in this chapter: discussion boards, blogs, IRC, and more. Some of the more popular places where you can find help include:
  • Ask Fedora - Fedora's knowledge base, available in multiple languages
  • The #fedora IRC channel on FreeNode - one of the main IRC channels used by Fedora users, English only
  • Fedora Project Wiki - the official wiki for Fedora Project
  • Stack Exchange - an English language Q&A board, not specific to Fedora

Note

The above list is by no means complete - you can find help in many other places as well. Additional information about available resources such as IRC channels and mailing lists is available at https://fedoraproject.org/wiki/Communicating_and_getting_help.
Before you open a new discussion or ask anyone for help on IRC, you should always do some research on your own. If you are encountering an issue, there is usually a good chance that someone else ran into the same problem before you and published a solution somewhere. Opening a discussion about something already explained elsewhere, or asking a common question which has been answered many times before, is not likely to result in a friendly, constructive response.
When you ask for help troubleshooting problems related to the installation, you may be asked to provide log files generated by the installer. The sections below explain which files are generated, what their contents are, and how to transfer them from the installation system.

6.1.1. Log Files Generated During the Installation

For debugging purposes, Anaconda logs installation actions into files in the /tmp directory. These files are listed in the following table.

Table 6.1. Log Files and Their Contents

Log file Contents
/tmp/anaconda.log general Anaconda messages
/tmp/program.log all external programs run during the installation
/tmp/storage.log extensive storage module information
/tmp/packaging.log yum and rpm package installation messages
/tmp/syslog hardware-related system messages
If the installation fails, the messages from these files are consolidated into /tmp/anaconda-tb-identifier, where identifier is a random string.

6.1.2. Transferring Log Files from the Installation System

All of the files described in Section 6.1.1, “Log Files Generated During the Installation” reside in the installation program's RAM disk, which means they are not saved permamently and will be lost once the system is powered down. To store them permanently, copy those files to another system on the network using scp on the system running the installation program, or copy them to a mounted storage device (such as an USB flash drive). Details on how to transfer the log files are below. Note that if you use an USB flash drive or other removable media, you should make sure to back up any data on it before starting the procedure.

6.1.2.1. Transferring Log Files Onto a USB Drive

  1. On the system you are installing, press Ctrl+Alt+F2 to access a shell prompt. You will be logged into a root account and you will have access to the installation program's temporary file system.
  2. Connect a USB flash drive to the system and execute the dmesg command. A log detailing all recent events will be displayed. At the bottom of this log, you will see a set of messages caused by the USB flash drive you just connected. It will look like a set of lines similar to the following:
    [ 170.171135] sd 5:0:0:0: [sdb] Attached SCSI removable disk
    
    Note the name of the connected device - in the above example, it is sdb.
  3. Go to the /mnt directory and once there, create new directory which will serve as the mount target for the USB drive. The name of the directory does not matter; this example uses the name usb.
    # mkdir usb
    
  4. Mount the USB flash drive onto the newly created directory. Note that in most cases, you do not want to mount the whole drive, but a partition on it. Therefore, do not use the name sdb - use the name of the partition you want to write the log files to. In this example, the name sdb1 is used.
    # mount /dev/sdb1 /mnt/usb
    
    You can now verify that you mounted the correct device and partition by accessing it and listing its contents - the list should match what you expect to be on the drive.
    # cd /mnt/usb
    
    # ls
    
  5. Copy the log files to the mounted device.
    # cp /tmp/*log /mnt/usb
    
  6. Unmount the USB flash drive. If you get an error message saying that the target is busy, change your working directory to outside the mount (for example, /).
    # umount /mnt/usb
    
The log files from the installation are now saved on the USB flash drive.

6.1.2.2. Transferring Log Files Over the Network

  1. On the system you are installing, press Ctrl+Alt+F2 to access a shell prompt. You will be logged into a root account and you will have access to the installation program's temporary file system.
  2. Switch to the /tmp directory where the log files are located:
    # cd /tmp
    
  3. Copy the log files onto another system on the network using the scp command:
    # scp *log user@address:path
    
    Replace user with a valid user name on the target system, address with the target system's address or host name, and path with the path to the directory you wish to save the log files into. For example, if you want to log in as john to a system with an IP address of 192.168.0.122 and place the log files into the /home/john/logs/ directory on that system, the command will have the following form:
    # scp *log john@192.168.0.122:/home/john/logs/
    
    When connecting to the target system for the first time, you may encounter a message similar to the following:
    The authenticity of host '192.168.0.122 (192.168.0.122)' can't be established.
    ECDSA key fingerprint is a4:60:76:eb:b2:d0:aa:23:af:3d:59:5c:de:bb:c4:42.
    Are you sure you want to continue connecting (yes/no)?
    
    Type yes and press Enter to continue. Then, provide a valid password when prompted. The files will start transferring to the specified directory on the target system.
The log files from the installation are now permanently saved on the target system and available for review.

6.2. Trouble Beginning the Installation

6.2.1. Problems with Booting into the Graphical Installation

Systems with some video cards have trouble booting into the graphical installation program. If the installation program does not run using its default settings, it attempts to run in a lower resolution mode. If that still fails, the installation program attempts to run in text mode.
There are several possible solutions to display issues, most of which involve specifying custom boot options. For more information, see Section 8.1, “Configuring the Installation System at the Boot Menu”.
Use the basic graphics mode
You can attempt to perform the installation using the basic graphics driver. To do this, edit the installation program's boot options and append inst.xdriver=vesa at the end of the command line.
Specify the display resolution manually
If the installation program fails to detect your screen resolution, you can override the automatic detection and specify it manually. To do this, append the inst.resolution=x option at the boot menu, where x is your display's resolution (for example, 1024x768).
Use an alternate video driver
You can also attempt to specify a custom video driver, overriding the installation program's automatic detection. To specify a driver, use the inst.xdriver=x option, where x is the device driver you want to use (for example, nouveau).

Note

If specifying a custom video driver solves your problem, you should report it as a bug at https://bugzilla.redhat.com under the anaconda component. Anaconda should be able to detect your hardware automatically and use the appropriate driver without your intervention.
Perform the installation using VNC
If the above options fail, you can use a separate system to access the graphical installation over the network, using the Virtual Network Computing (VNC) protocol. For details on installing using VNC, see Chapter 11, Installing Using VNC.

6.2.2. Serial Console Not Detected

In some cases, attempting to install in text mode using a serial console will result in no output on the console. This happens on systems which have a graphics card, but no monitor connected. If Anaconda detects a graphics card, it will attempt to use it for a display, even if no display is connected.
If you want to perform a text-based installation on a serial console, use the inst.text and console= boot options. See Chapter 8, Boot Options for more details.

6.3. Trouble During the Installation

6.3.1. No Disks Detected

In the Installation Destination screen, the following error message may appear at the bottom: No disks detected. Please shut down the computer, connect at least one disk, and restart to complete installation.
The message indicates that Anaconda did not find any writable storage devices to install to. In that case, first make sure that your system does have at least one storage device attached.
If your system uses a hardware RAID controller, verify that the controller is properly configured and working. See your controller's documentation for instructions.
If you are installing into one or more iSCSI devices and there is no local storage present on the system, make sure that all required LUNs (Logical Unit Numbers) are being presented to the appropriate HBA (Host Bus Adapter).
If you made sure you have a connected and properly configured storage device and the message still appears after you reboot the system and start the installation again, it means that the installation program failed to detect the storage. In most cases this message appears when you attempt to install on an SCSI device which has not been recognized by the installation program.

6.4. Problems After Installation

6.4.1. Are You Unable to Boot With Your RAID Card?

If you have performed an installation and cannot boot your system properly, you may need to reinstall and partition your system's storage differently.
Some BIOS types do not support booting from RAID cards. After you finish the installation and reboot the system for the first time, a text-based screen showing the boot loader prompt (for example, grub>) and a flashing cursor may be all that appears. If this is the case, you must repartition your system and move your /boot partition and the boot loader outside the RAID array. The /boot partition and the boot loader must be on the same drive.
Once these changes have been made, you should be able to finish your installation and boot the system properly. For more information about partitioning, see Section 4.3.8, “Installation Destination”.

6.4.2. Trouble With the Graphical Boot Sequence

After you finish the installation and reboot your system for the first time, it is possible that the system stops responding during the graphical boot sequence, requiring a reset. In this case, the boot loader is displayed successfully, but selecting any entry and attempting to boot the system results in a halt. This usually means a problem with the graphical boot sequence; to solve this issue, you must disable graphical boot. To do this, temporarily alter the setting at boot time before changing it permanently.

Procedure 6.1. Disabling Graphical Boot Temporarily

  1. Start your computer and wait until the boot loader menu appears. If you set your boot loader timeout period to 0, hold down the Esc key to access it.
  2. When the boot loader menu appears, use your cursor keys to highlight the entry you want to boot and press the e key to edit this entry's options.
  3. In the list of options, find the kernel line - that is, the line beginning with the keyword linux (or, in some cases, linux16 or linuxefi). On this line, locate the rhgb option and delete it. The option may not be immediately visible; use the cursor keys to scroll up and down.
  4. Press F10 or Ctrl+X to boot your system with the edited options.
If the system started successfully, you can log in normally. Then you will need to disable the graphical boot permanently - otherwise you will have to perform the previous procedure every time the system boots. To permanently change boot options, do the following.

Procedure 6.2. Disabling Graphical Boot Permanently

  1. Log in to the root account using the su - command:
    $ su -
    
  2. Open the /etc/default/grub configuration file using a plain text editor such as vim.
  3. Within the grub file, locate the line beginning with GRUB_CMDLINE_LINUX. The line should look similar to the following:
    GRUB_CMDLINE_LINUX="rd.lvm.lv=rhel/root rd.md=0 rd.dm=0 vconsole.keymap=us $([ -x /usr/sbin/rhcrashkernel-param ] && /usr/sbin/rhcrashkernel-param || :) rd.luks=0 vconsole.font=latarcyrheb-sun16 rd.lvm.lv=vg_rhel/swap rhgb quiet"
    
    On this line, delete the rhgb option.
  4. Save the edited configuration file.
  5. Refresh the boot loader configuration by executing the following command:
    # grub2-mkconfig --output=/boot/grub2/grub.cfg
    
After you finish this procedure, you can reboot your computer. Fedora will not use the graphical boot sequence any more. If you wish to enable graphical boot, follow the same procedure, add the rhgb option to the GRUB_CMDLINE_LINUX line in the /etc/default/grub file and refresh the boot loader configuration again using the grub2-mkconfig command.
See the Fedora System Administrator's Guide, available at Fedora Documentation, for more information about working with the GRUB2 boot loader.

6.4.3. Booting into a Graphical Environment

If you have installed the X Window System and a desktop environment such as GNOME, but are not seeing a graphical desktop environment once you log into your system, you can start it manually using the startx command. Note, however, that this is just a one-time fix and does not change the log in process for future log ins.
To set up your system so that you can log in at a graphical login screen, you must change the default systemd target to graphical.target. When you are finished, reboot the computer. You will presented with a graphical login prompt after the system restarts.

Procedure 6.3. Setting Graphical Login as Default

  1. Open a shell prompt. If you are in your user account, become root by typing the su - command.
  2. Change the default target to graphical.target. To do this, execute the following command:
    # systemctl set-default graphical.target
    
Graphical login is now enabled by default - you will be presented with a graphical login prompt after the next reboot. If you want to reverse this change and keep using the text-based login prompt, execute the following command as root:
# systemctl set-default multi-user.target
For more information about targets in systemd, see the Fedora System Administrator's Guide, available at Fedora Documentation.

6.4.4. No Graphical User Interface Present

If you are having trouble getting X (the X Window System) to start, it is possible that it has not been installed. Some of the pre-set base environments you can select during the installation, such as Minimal install or Web Server, do not include a graphical interface - it has to be installed manually.
If you want X, you can install the necessary packages after the installation using the Yum package manager. For example, to install GNOME, use yum install gnome-shell as root.

6.4.5. X Server Crashing After User Logs In

If you are having trouble with the X server crashing when a user logs in, one or more of your file systems may be full (or nearly full). To verify that this is the problem you are experiencing, execute the following command:
$ df -h
The output will help you diagnose which partition is full - in most cases, the problem will be on the /home partition. A sample output of the df command may look similar to the following:
Filesystem                                  Size  Used Avail Use% Mounted on
/dev/mapper/vg_rhel-root                     20G  6.0G   13G  32% /
devtmpfs                                    1.8G     0  1.8G   0% /dev
tmpfs                                       1.8G  2.7M  1.8G   1% /dev/shm
tmpfs                                       1.8G 1012K  1.8G   1% /run
tmpfs                                       1.8G     0  1.8G   0% /sys/fs/cgroup
tmpfs                                       1.8G  2.6M  1.8G   1% /tmp
/dev/sda1                                   976M  150M  760M  17% /boot
/dev/dm-4                                    90G   90G     0 100% /home
In the above example, you can see that the /home partition is full, which causes the crash. You can make some room on the partition by removing unneeded files. After you free up some disk space, start X using the startx command.
For additional information about df and an explanation of the options available (such as the -h option used in this example), see the df(1) man page.

6.4.6. Is Your RAM Not Being Recognized?

In some cases the kernel does not recognize all of your memory (RAM), which causes the system to use less memory than is installed. You can find out how much RAM is being utilized using the 
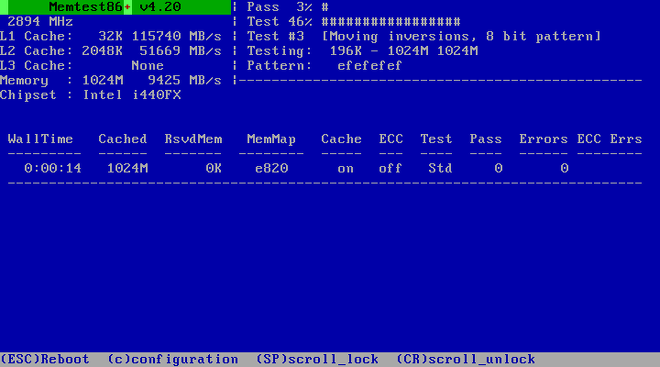
free -m command. If the displayed total amount of memory does not match your expectations, it is likely that at least one of your memory modules is faulty. On BIOS-based systems, you can use the Memtest86+ utility to test your system's memory - see Section 8.5.1, “Loading the Memory (RAM) Testing Mode” for details.

Note

If you have 4GB or more memory installed, but Fedora only shows around 3.5GB or 3.7GB, you have probably installed a 32-bit version of Fedora on a 64bit kernel. For modern systems, use the 64-bit (x86_64) version.
Some hardware configurations have a part of the system's RAM reserved and unavailable to the main system. Notably, laptop computers with integrated graphics cards will reserve some memory for the GPU. For example, a laptop with 4 GB of RAM and an integrated Intel graphics card will show only roughly 3.7 GB of available memory, even with a 64-bit system.
Additionally, the kdump crash kernel dumping mechanism reserves some memory for the secondary kernel used in case of the primary kernel crashing. This reserved memory will also not be displayed as available when using the free command. For details about kdump and its memory requirements, see the Fedora System Administrator's Guide, available at Fedora Documentation.
If you made sure that your memory does not have any issues, you can try and set the amount of memory manually using the mem= kernel option.

Procedure 6.4. Configuring the Memory Manually

  1. Start your computer and wait until the boot loader menu appears. If you set your boot loader timeout period to 0, hold down the Esc key to access it.
  2. When the boot loader menu appears, use your cursor keys to highlight the entry you want to boot and press the e key to edit this entry's options.
  3. In the list of options, find the kernel line - that is, the line beginning with the keyword linux (or, in some cases, linux16). Append the following option to the end of this line:
    mem=xxM
    
    Replace xx with the amount of RAM you have in megabytes.
  4. Press F10 or Ctrl+X to boot your system with the edited options.
  5. Wait for the system to boot and log in. Then, open a command line and execute the free -m command again. If total amount of RAM displayed by the command matches your expectations, append the following to the line beginning with GRUB_CMDLINE_LINUX in the /etc/default/grub file to make the change permanent:
    mem=xxM
    
    Replace xx with the amount of RAM you have in megabytes.
  6. After you updated the file and saved it, refresh the boot loader configuration so that the change will take effect. Run the following command with root privileges:
    # grub2-mkconfig --output=/boot/grub2/grub.cfg
    
In /etc/default/grub, the above example would look similar to the following:
GRUB_TIMEOUT=5
GRUB_DISTRIBUTOR="$(sed 's, release.*$,,g' /etc/system-release)"
GRUB_DEFAULT=saved
GRUB_DISABLE_SUBMENU=true
GRUB_TERMINAL_OUTPUT="console"
GRUB_CMDLINE_LINUX="rd.lvm.lv=rhel/root vconsole.font=latarcyrheb-sun16 rd.lvm.lv=rhel/swap $([ -x /usr/sbin/rhcrashkernel.param ] && /usr/sbin/rhcrashkernel-param || :) vconsole.keymap=us rhgb quiet mem=1024M"
GRUB_DISABLE_RECOVERY="true"
See the Fedora System Administrator's Guide, available at Fedora Documentation, for more information about working with the GRUB2 boot loader.

Chapter 7. Next Steps

intro text

7.1. Common Post-installation Tasks

text

7.2. Other Technical Documentation

text

Part II. Advanced Installation Options

This part of the Fedora Installation Guide covers more advanced topics, which will be useful to users who need to perform a non-standard installation. It contains information about custom boot options, automating the installation using Kickstart, booting from a network location instead of local media, etc.

Table of Contents

8. Boot Options
8.1. Configuring the Installation System at the Boot Menu
8.2. Available Boot Options
8.2.1. Specifying the Installation Source
8.2.2. Kickstart Boot Options
8.2.3. Console, Environment and Display Options
8.2.4. Network Boot Options
8.2.5. Advanced Installation Options
8.2.6. Enabling Remote Access Using VNC
8.2.7. Debugging and Troubleshooting
8.3. Deprecated Boot Options
8.4. Removed Boot Options
8.5. Using the Maintenance Boot Modes
8.5.1. Loading the Memory (RAM) Testing Mode
8.5.2. Verifying Boot Media
8.5.3. Booting Your Computer in Rescue Mode
9. Automating the Installation with Kickstart
9.1. How to Perform a Kickstart Installation
9.1.1. Creating a Kickstart File
9.1.2. Verifying the Kickstart File
9.1.3. Making the Kickstart File Available
9.1.4. Starting the Kickstart Installation
10. Setting Up an Installation Server
10.1. PXE Installation Overview
10.2. DHCP Server Configuration
10.3. Installing the tftp server
10.4. Providing and configuring bootloaders for PXE clients
10.5. Getting the kernel and initrd
10.6. Providing repositories
10.7. Advanced network installations with Cobbler
11. Installing Using VNC
11.1. Installing a VNC Viewer
11.2. Performing a VNC Installation
11.2.1. Choosing a VNC Installation Mode
11.2.2. Installing in VNC Direct Mode
11.2.3. Installing in VNC Connect Mode
11.3. Kickstart Considerations
11.4. Considerations for Headless Systems
12. Upgrading Your Current System
12.1. Automatic System Upgrade Using FedUp
12.2. Manual System Upgrade or Reinstallation

Chapter 8. Boot Options

The Anaconda installer includes a range of boot options for administrators, which modify the default behavior of the installation program by enabling or disabling certain functions. To use one or more boot options, you either have to boot from installation media and append these options at the boot menu (see Section 3.3, “The Boot Menu”), or you must add them into your PXE server configuration file if you are booting from a network (see Chapter 10, Setting Up an Installation Server).
You can use multiple options at the same time; in that case, separate them by a single space.
There are two basic types of options described in this chapter:
  • Options presented as ending with an "equals" sign (=) require a value to be specified - they cannot be used on their own. For example, the inst.vncpassword= option must also contain a value (in this case, a password). The correct form is therefore inst.vncpassword=password. On its own, without a password specified, the option is invalid.
  • Options presented without the "=" sign do not accept any values or parameters. For example, the rd.live.check option forces Anaconda to verify the installation media before starting the installation; if this option is present, the check will be performed, and if it is not present, the check will be skipped.
In addition to the options described in this chapter, the boot prompt also accepts dracut kernel options. A list of these options is available as the dracut.cmdline(7) man page.

Note

Boot options specific to the installation program always start with inst. in this guide. Currently, this prefix is optional - for example, resolution=1024x768 will work exactly the same as inst.resolution=1024x768. However, it is expected that the inst. prefix will be mandatory in future releases.

8.1. Configuring the Installation System at the Boot Menu

The exact way to specify custom boot options is differs based on your system's architecture, firmware and the method you use to boot the installation. If you are booting from local media, you can specify options in the boot menu, before you begin the installation; if you are booting from a network using a PXE server, you must add boot options into the boot loader configuration file before you boot the installation system. For specific instructions, see Section 3.3, “The Boot Menu” if you are booting from local media, and Chapter 10, Setting Up an Installation Server if you are booting from a server.

8.2. Available Boot Options

The following options are available in Fedora:

8.2.1. Specifying the Installation Source

inst.repo=
Specifies the installation source - that is, a location where the installation program can find the images and packages it requires. For example:
inst.repo=cdrom
The source must be either:
  • an installable tree, which is a directory structure containing the installation program's images, packages and repodata as well as a valid .treeinfo file
  • a DVD (a physical disk present in the system's DVD drive)
  • an ISO image of the full Fedora installation DVD, placed on a hard drive or a network location accessible from the installation system
This option allows for the configuration of different installation methods using different formats. The syntax is described in the table below.

Table 8.1. Installation Sources

Installation source Option format
Any CD/DVD drive inst.repo=cdrom
Specific CD/DVD drive inst.repo=cdrom:device
Hard Drive inst.repo=hd:device:/path
HTTP Server inst.repo=http://host/path
HTTPS Server inst.repo=https://host/path
FTP Server inst.repo=ftp://username:password@host/path
NFS Server inst.repo=nfs:[options:]server:/path [a]
[a] This option uses NFS protocol version 3 by default. To use a different version, add +nfsvers=X to options.
Disk device names may be specified using the following formats:
  • Kernel device name, for example /dev/sda1 or sdb2
  • File system label, for example LABEL=Flash or LABEL=RHEL7
  • File system UUID, for example UUID=8176c7bf-04ff-403a-a832-9557f94e61db
Non-alphanumeric characters must be represented as \xNN, where NN is the hexadecimal representation of the character. For example, \x20 is a white space (" ").
inst.stage2=
Specifies the location of the installation program runtime image to be loaded. The syntax is the same as in Table 8.1, “Installation Sources”. This option will ignore everything except for the image itself, it is not possible to use it to specify the location of packages.
inst.dd=
If you need to perform a driver update during the installation, use the inst.dd= option. It can be used multiple times. The location of a driver RPM package can be specified using any of the formats described in Table 8.1, “Installation Sources”. With the exception of the inst.dd=cdrom option, the device name must always be specified. For example:
inst.dd=/dev/sdb1
Using this option without any parameters (only as inst.dd) will prompt the installation program to ask you for a driver update disk with an interactive menu.
Note that you should never attempt to perform a driver update during the installation unless a missing our faulty driver is preventing you from completing the installation. Updating drivers which are not essential during the installation should always be performed after the system is installed.

8.2.2. Kickstart Boot Options

inst.ks=
Gives the location of a Kickstart file to be used to automate the installation. Locations can be specified using any of the formats valid for inst.repo=. See Table 8.1, “Installation Sources” for valid formats.
If you only specify a device and not a path, the installation program will look for the Kickstart file in /ks.cfg on the specified device. If you use this option without specifying a device, the installation program will use the following:
inst.ks=nfs:next-server:/filename
In the above example, next-server is the DHCP next-server option or the IP address of the DHCP server itself, and filename is the DHCP filename option, or /kickstart/. If the given file name ends with the / character, ip-kickstart is appended. For example:

Table 8.2. Default Kickstart File Location

DHCP server address Client address Kickstart file location
192.168.122.1 192.168.122.100 192.168.122.1:/kickstart/192.168.122.100-kickstart
inst.ks.sendmac
Adds headers to outgoing HTTP requests with the MAC addresses of all network interfaces. For example:
X-RHN-Provisioning-MAC-0: eth0 01:23:45:67:89:ab
This can be useful when using inst.ks=http to provision systems.
inst.ks.sendsn
Adds a header to outgoing HTTP requests. This header will contain the system's serial number, read from /sys/class/dmi/id/product_serial. The header has the following syntax:
X-System-Serial-Number: R8VA23D

8.2.3. Console, Environment and Display Options

console=
This kernel option specifies a device to be used as the primary console. For example, to use a console on the first serial port, use console=ttyS0. This option should be used along with the inst.text option.
You can use this option multiple times. In that case, the boot message will be displayed on all specified consoles, but only the last one will be used by the installation program afterwards. For example, if you specify console=ttyS0 console=ttyS1, the installation program will only use ttyS1.
noshell
Disables access to the root shell during the installation. This is useful with automated (Kickstart) installations - if you use this option, a user can watch the installation progress, but they cannot interfere with it by accessing the root shell by pressing Ctrl+Alt+F2.
inst.lang=
Sets the language to be used during the installation. Language codes are the same as the ones used in the lang Kickstart command as described in Appendix A, Kickstart Syntax Reference. On systems where the system-config-language package is installed, a list of valid values can also be find in /usr/share/system-config-language/locale-list.
inst.geoloc=
Configures geolocation usage in the installation program. Geolocation is used to pre-set the language and time zone, and uses the following syntax: inst.geoloc=value
The value parameter can be any of the following:

Table 8.3. Valid Values for the inst.geoloc Option

Disable geolocation inst.geoloc=0
Use the Fedora GeoIP API inst.geoloc=provider_fedora_geoip
Use the Hostip.info GeoIP API inst.geoloc=provider_hostip
If this option is not specified, Anaconda will use provider_fedora_geoip.
inst.keymap=
Specifies the keyboard layout to be used by the installation program. Layout codes are the same as the ones used in the keyboard Kickstart command as described in Appendix A, Kickstart Syntax Reference.
inst.text
Forces the installation program to run in text mode instead of graphical mode. The text user interface is limited, for example, it does not allow you to modify the partition layout or set up LVM. When installing a system on a machine with a limited graphical capabilities, it is recommended to use VNC as described in Section 8.2.6, “Enabling Remote Access Using VNC”.
inst.cmdline
Forces the installation program to run in command line mode. This mode does not allow any interaction, all options must be specified in a Kickstart file or on the command line.
inst.graphical
Forces the installation program to run in graphical mode. This mode is the default.
inst.resolution=
Specifies the screen resolution in graphical mode. The format is NxM, where N is the screen width and M is the screen height (in pixels). The lowest supported resolution is 640x480.
inst.headless
Specifies that the machine being installed onto does not have any display hardware. In other words, this options prevents the installation program from trying to detect a screen.
inst.xdriver=
Specifies the name of the X driver to be used both during the installation and on the installed system.
inst.usefbx
Tells the installation program to use the frame buffer X driver instead of a hardware-specific driver. This option is equivalent to inst.xdriver=fbdev.
modprobe.blacklist=
Blacklists (completely disables) one or more drivers. Drivers (mods) disabled using this option will be prevented from loading when the installation starts, and after the installation finishes, the installed system will keep these settings. The blacklisted drivers can then be found in the /etc/modprobe.d/ directory.
Use a comma-separated list to disable multiple drivers. For example:
modprobe.blacklist=ahci,firewire_ohci
inst.sshd
Starts the sshd service during the installation, which allows you to connect to the system during the installation using SSH and monitor its progress. For more information on SSH, see the ssh(1) man page and the corresponding chapter in the Fedora System Administrator's Guide, available at the Fedora Documentation website.

Note

During the installation, the root account has no password by default. You can set a root password to be used during the installation with the sshpw Kickstart command as described in Appendix A, Kickstart Syntax Reference.

8.2.4. Network Boot Options

Initial network initialization is handled by dracut. This section only lists some of the more commonly used options; for a complete list, see the dracut.cmdline(7) man page. Additional information on networking is also available in the Fedora Networking Guide, available at the Fedora Documentation website.
ip=
Configures one or more network interfaces. To configure multiple interfaces, use the ip option multiple times - once for each interface. If multiple interfaces are configured, you must specify a primary boot interface using the bootdev option described below.
The following table lists valid values for this option:

Table 8.4. Network Interface Configuration Formats

Configuration Method Option format
Automatic configuration of any interface ip=method
Automatic configuration of a specific interface ip=interface:method
Static configuration ip=ip::gateway:netmask:hostname:interface:none
Automatic configuration of a specific interface with an override [a] ip=ip::gateway:netmask:hostname:interface:method:mtu
[a] Brings up the specified interface using the specified method of automatic configuration, such as dhcp, but overrides the automatically obtained IP address, gateway, netmask, hostname or other specified parameter. All parameters are optional; only specify the ones you wish to override and automatically obtained values will be used for the others.
The method parameter can be any the following:

Table 8.5. Automatic Interface Configuration Methods

Automatic configuration method Value
DHCP dhcp
IPv6 DHCP dhcp6
IPv6 automatic configuration auto6
iBFT (iSCSI Boot Firmware Table) ibft

Note

If you use a boot option which requires network access, such as inst.ks=http://host:/path, without specifying the ip option, the installation program will use ip=dhcp.
In the above tables, the ip parameter specifies the client's IP address. IPv6 addresses can be specified by putting them in square brackets, for example, [2001:DB8::1].
The gateway parameter is the default gateway. IPv6 addresses are accepted here as well.
The netmask parameter is the netmask to be used. This can either be a full netmask (for example 255.255.255.0) or a prefix (for example 64).
The hostname parameter is the host name of the client system. This parameter is optional.
nameserver=
Specifies the address of the name server. This option can be used multiple times.
bootdev=
Specifies the boot interface. This option is mandatory if you use more than one ip option.
ifname=
Assigns a given interface name to a network device with a given MAC address. Can be used multiple times. The syntax is ifname=interface:MAC. For example:
ifname=eth0:01:23:45:67:89:ab
inst.dhcpclass=
Specifies the DHCP vendor class identifier. The dhcpd service will see this value as vendor-class-identifier. The default value is anaconda-$(uname -srm).
vlan=
Sets up a Virtual LAN (VLAN) device on a specified interface with a given name. The syntax is vlan=name:interface. For example:
vlan=vlan5:em1
The above will set up a VLAN device named vlan5 on the em1 interface. The name can take the following forms:

Table 8.6. VLAN Device Naming Conventions

Naming scheme Example
VLAN_PLUS_VID vlan0005
VLAN_PLUS_VID_NO_PAD vlan5
DEV_PLUS_VID em1.0005.
DEV_PLUS_VID_NO_PAD em1.5.
bond=
Set up a bonding device with the following syntax: bond=name[:slaves][:options]. Replace name with the bonding device name, slaves with a comma-separated list of physical (ethernet) interfaces, and options with a comma-separated list of bonding options. For example:
bond=bond0:em1,em2:mode=active-backup,tx_queues=32,downdelay=5000
For a list of available options, execute the modinfo bonding command.
Using this option without any parameters will assume bond=bond0:eth0,eth1:mode=balance-rr.
team=
Set up a team device with the following syntax: team=master:slaves. Replace master with the name of the master team device and slaves with a comma-separated list of physical (ethernet) devices to be used as slaves in the team device. For example:
team=team0:em1,em2

8.2.5. Advanced Installation Options

inst.multilib
Configure the system for multilib packages (that is, to allow installing 32-bit packages on a 64-bit x86 system) and install packages specified in this section as such.
Normally, on an AMD64 or Intel 64 system, only packages for this architecture (marked as x86_64) and packages for all architectures (marked as noarch would be installed. When you use this option, packages for 32-bit AMD or Intel systems (marked as i686) will be automatically installed as well if available.
This only applies to packages directly specified in the %packages section. If a package is only installed as a dependency, only the exact specified dependency will be installed. For example, if you are installing package foo which depends on package bar, the former will be installed in multiple variants, while the latter will only be installed in variants specifically required.
inst.gpt
Force the installation program to install partition information into a GUID Partition Table (GPT) instead of a Master Boot Record (MBR). This option is meaningless on UEFI-based systems, unless they are in BIOS compatibility mode.
Normally, BIOS-based systems and UEFI-based systems in BIOS compatibility mode will attempt to use the MBR schema for storing partitioning information, unless the disk is larger than 2 TB. Using this option will change this behavior, allowing a GPT to be written even to disks smaller than 2 TB.
inst.zram
This option controls the usage of zRAM swap during the installation. It creates a compressed block device inside the system RAM and uses it for swap space instead of the hard drive. This allows the installer to essentially increase the amount of memory available, which makes the installation faster on systems with low memory.
By default, swap on zRAM is enabled on systems with 2 GB or less RAM, and disabled on systems with more than 2 GB of memory. You can use this option to change this behavior - on a system with more than 2 GB RAM, use inst.zram=1 to enable it, and on systems with 2 GB or less memory, use inst.zram=0 to disable this feature.

8.2.6. Enabling Remote Access Using VNC

The following options are necessary to configure Anaconda for remote graphical installation. See Chapter 11, Installing Using VNC for more details.
inst.vnc
Specifies that the installation program's graphical interface should be run in a VNC session. If you specify this option, you will need to connect to the system using a VNC client application to be able to interact with the installation program. VNC sharing is enabled, so multiple clients can connect to the system at the same time.

Note

A system installed using VNC will start in text mode by default.
inst.vncpassword=
VNC server used by the installation program. Any VNC client attempting to connect to the system will have to provide the correct password to gain access. For example, inst.vncpassword=testpwd will set the password to testpwd. The password must be between 6 and 8 characters long.

Note

If you specify an invalid password (one that is too short or too long), you will be prompted to specify a new one by a message from the installation program:
VNC password must be six to eight characters long.
Please enter a new one, or leave blank for no password.

Password:
inst.vncconnect=
Connect to a listening VNC client at a specified host and port once the installation starts. The correct syntax is inst.vncconnect=host:port. The port parameter is optional - if you do not specify one, the installation program will use 5900.

8.2.7. Debugging and Troubleshooting

inst.updates=
Specifies the location of the updates.img file to be applied to the installation program runtime. The syntax is the same as in the inst.repo option - see Table 8.1, “Installation Sources” for details. In all formats, if you do not specify a file name but only a directory, the installation program will look for a file named updates.img.
inst.loglevel=
Specifies the minimum level for messages to be logged on a terminal. This only concerns real-time logging in a terminal; log files will always contain messages of all levels.
Possible values for this option from the lowest to highest level are: debug, info, warning, error and critical. The default value is info, which means that by default, the logging terminal will display messages ranging from info to critical, but not debug.
inst.syslog=
Once the installation starts, this options sends log messages to the syslog process on the specified host. The remote syslog process must be configured to accept incoming connections.
inst.virtiolog=
Specifies a virtio port (a character device at /dev/virtio-ports/name) to be used for forwarding logs. The default value is org.fedoraproject.anaconda.log.0; if this port is present, it will be used.

8.3. Deprecated Boot Options

Options in this list are deprecated. They will still work, but there are other options which offer the same functionality and should be preferred. Using deprecated options is not recommended and they are expected to be removed in future releases.

Note

Note that as described in the introduction to this chapter, options specific to the installation program now use the inst. prefix. For example, the vnc= option is considered deprecated and replaced by the inst.vnc= option. However, these changes are not listed here.
method=
Configured the installation method. Use the inst.repo= option instead.
repo=nfsiso:server:/path
In NFS installations, specified that the target is an ISO image located on an NFS server instead of an installable tree. The difference is now detected automatically, which means this option is the same as inst.repo=nfs:server:/path.
dns=
Configured the Domain Name Server (DNS). Use the nameserver= option instead.
netmask=, gateway=, hostname=, ip=, ipv6=
These options have been consolidated under the ip= option.
ksdevice=
Select network device to be used at early stage of installation. Different values have been replaced with different options; see the table below.

Table 8.7. Automatic Interface Configuration Methods

Value Current behavior
Not present All devices are attempted to be activated using dhcp, unless desired device and configuration is specified by ip= option and/or the BOOTIF option.
ksdevice=link Similar to the above, with the difference that network will always be activated in the initramfs, whether it is needed or not. The supported rd.neednet option (provided by dracut) should be used instead.
ksdevice=bootif Ignored (the BOOTID= option is used by default when specified)
ksdevice=ibft Replaced with the ip=ibft option
ksdevice=MAC Replaced with BOOTIF=MAC
ksdevice=device Replaced by specifying the device name using the ip= option.

Important

When performing a Kickstart installation, booting from local media and having the Kickstart file on local media as well, the network will not be initialized. This means that any other Kickstart options requiring network access, such as pre-installation or post-installation scripts accessing a network location, will cause the installation to fail. This is a known issue; see BZ#1085310 for details.
To work around this issue, either use the ksdevice=link boot option, or add the --device=link option to the network command in your Kickstart file.
blacklist=
Used to disable specified drivers. This is now handled by the modprobe.blacklist= option.
nofirewire=
Disabled support for the FireWire interface. You can disable the FireWire driver (firewire_ohci) by using the modprobe.blacklist= option instead:
modprobe.blacklist=firewire_ohci

8.4. Removed Boot Options

The following options are removed. They were present in previous releases of Fedora, but they cannot be used anymore.
askmethod, asknetwork
The installation program's initramfs is now completely non-interactive, which means that these options are not available anymore. Instead, use the inst.repo= to specify the installation method and ip= to configure network settings.
serial
This option forced Anaconda to use the /dev/ttyS0 console as the output. Use the console=/dev/ttyS0 (or similar) instead.
updates=
Specified the location of updates for the installation program. Use the inst.updates= option instead.
essid=, wepkey=, wpakey=
Configured wireless network access. Network configuration is now being handled by dracut, which does not support wireless networking, rendering these options useless.
ethtool=
Used in the past to configure additional low-level network settings. All network settings are now handled by the ip= option.
gdb
Allowed you to debug the loader. Use rd.debug instead.
mediacheck
Verified the installation media before starting the installation. Replaced with the rd.live.check option.
ks=floppy
Specified a floppy disk as the Kickstart file source. Floppy drives are not supported anymore.
display=
Configured a remote display. Replaced with the inst.vnc option.
utf8
Added UTF8 support when installing in text mode. UTF8 support now works automatically.
noipv6
Used to disable IPv6 support in the installation program. IPv6 is now built into the kernel so the driver cannot be blacklisted; however, it is possible to disable IPv6 using the ipv6.disable option.
upgradeany
Upgrades are done in a different way in current Fedora releases. For more information about upgrading your system, see Chapter 12, Upgrading Your Current System.
vlanid=
Used to configure Virtual LAN (802.1q tag) devices. Use the vlan= option instead.

8.5. Using the Maintenance Boot Modes

8.5.1. Loading the Memory (RAM) Testing Mode

Faults in memory (RAM) modules may cause your system to freeze or crash unpredictably. In some cases, memory faults may only cause errors with particular combinations of software. For this reason, you should test the memory of a computer before you install Fedora for the first time, even if it has previously run other operating systems.
Fedora includes the Memtest86+ memory testing application. To start memory testing mode, choose Troubleshooting > Memory test at the boot menu. Testing will begin immediately. By default, Memtest86+ carries out ten tests in every pass; a different configuration can be specified by accessing the configuration screen using the c key. After the first pass completes, a message will appear at the bottom informing you of the current status, and another pass will start automatically.

Note

Memtest86+ only works on systems with BIOS firmware. Support for UEFI systems is currently unavailable.
Memory Check Using Memtest86+

Figure 8.1. Memory Check Using Memtest86+

The main screen displayed while testing is in progress is divided into three main areas:
  • The upper left corner shows information about your system's memory configuration - the amount of detected memory and processor cache and their throughputs and processor and chipset information. This information is detected when Memtest86+ starts.
  • The upper right corner displays information about the tests - progress of the current pass and the currently running test in that pass as well as a description of the test.
  • The central part of the screen is used to display information about the entire set of tests from the moment when the tool has started, such as the total time, the number of completed passes, number of detected errors and your test selection. On some systems, detailed information about the installed memory (such as the number of installed modules, their manufacturer, frequency and latency) will be also displayed here. After the each pass completes, a short summary will appear in this location. For example:
    ** Pass complete, no errors, press Esc to exit **
    
    If Memtest86+ detects an error, it will also be displayed in this area and highlighted red. The message will include detailed information such as which test detected a problem, the memory location which is failing, and others.
In most cases, a single successful pass (that is, a single run of all 10 tests) is sufficient to verify that your RAM is in good condition. In some rare circumstances, however, errors that went undetected on the first pass might appear on subsequent passes. To perform a thorough test on an important system, leave the tests running overnight or even for a few days in order to complete multiple passes.

Note

The amount of time it takes to complete a single full pass of Memtest86+ varies depending on your system's configuration (notably the RAM size and speed). For example, on a system with 2 GB of DDR2 memory at 667 MHz, a single pass will take roughly 20 minutes to complete.
To halt the tests and reboot your computer, press the Esc key at any time.
For more information about using Memtest86+, see the official website at http://www.memtest.org/. A README file is also located in /usr/share/doc/memtest86+-version/ on Fedora systems with the memtest86+ package installed.

8.5.2. Verifying Boot Media

You can test the integrity of an ISO-based installation source before using it to install Fedora. These sources include DVDs and ISO images stored on a local hard drive or NFS server. Verifying that the ISO images are intact before you attempt an installation helps to avoid problems that are often encountered during installation.
To test the integrity of an ISO image, append the rd.live.check to the boot loader command line. Note that this option is used automatically if you select the default installation option from the boot menu (Test this media & install Fedora).

8.5.3. Booting Your Computer in Rescue Mode

You may boot a command-line Linux system from an installation disc without actually installing Fedora on the computer. This enables you to use the utilities and functions of a running Linux system to modify or repair already installed operating systems.
To load the rescue system with the installation disk or USB drive, choose Rescue a Fedora system from the Troubleshooting submenu in the boot menu, or use the inst.rescue boot option.
Specify the language, keyboard layout and network settings for the rescue system with the screens that follow. The final setup screen configures access to the existing system on your computer.
By default, rescue mode attaches an existing operating system to the rescue system under the directory /mnt/sysimage/.

Chapter 9. Automating the Installation with Kickstart

Kickstart installations offer a means to automate the installation process, either partially or fully. Kickstart files contain answers to all questions normally asked by the installation program, such as what time zone do you want the system to use, how should the drives be partitioned or which packages should be installed. Providing a prepared Kickstart file when the installation begins therefore allows the you to perform the installation automatically, without need for any intervention from the user. This is especially useful when deploying Fedora on a large number of systems at once.
All Kickstart scripts and the log files of their execution are stored in the /tmp directory to assist with debugging installation issues.

9.1. How to Perform a Kickstart Installation

Kickstart installations can be performed using a local DVD, a local hard drive, or via NFS, FTP, HTTP, or HTTPS.
To use Kickstart, you must:
  1. Create a Kickstart file.
  2. Create boot media or configure a network boot (PXE) server which will be used to begin the installation.
  3. Make the Kickstart file available on removable media, a hard drive, or a network location.
  4. Start the Kickstart installation by booting the installer and using a boot option to tell the installer where to find the Kickstart file.
This chapter explains these steps in detail.

9.1.1. Creating a Kickstart File

The Kickstart file itself is a plain text file, containing keywords listed in Appendix A, Kickstart Syntax Reference, which serve as directions for the installation. Any text editor able to save files as ASCII text (such as Gedit or vim on Linux systems or Notepad on Windows systems) can be used to create and edit Kickstart files.
The recommended approach to creating Kickstart files is to perform a manual installation on one system first. After the installation completes, all choices made during the installation are saved into a file named anaconda-ks.cfg, located in the /root/ directory on the installed system. You can then copy this file, make any changes you need, and use the resulting configuration file in further installations.
When creating a Kickstart file, keep in mind the following:
  • Lines starting with a pound sign (#) are treated as comments and are ignored.
  • Sections must be specified in order. Items within the sections do not have to be in a specific order unless otherwise specified. The correct section order is:

    Important

    The %packages, %pre and %post sections must end with %end, otherwise the installation program will refuse the Kickstart file. The main command section has no special ending statement.
  • Omitting any required item results in the installation program prompting the user for an answer to the related item, just as the user would be prompted during a typical installation. Once the answer is given, the installation will continue. Note that if the system you are installing has no display, you will not be able to see the prompt, and the installation will appear to have failed.

9.1.2. Verifying the Kickstart File

When creating or customizing your kickstart file, it is useful to verify that it is valid before attempting to use it in an installation. Fedora includes the ksvalidator command line utility which can be used to do this. This tool is a part of the pykickstart package. To install this package, execute the following command:
# yum install pykickstart
After installing the package, you can validate a Kickstart file using the following command:
$ ksvalidator /path/to/kickstart.ks
Replace /path/to/kickstart.ks with the path to the Kickstart file you want to verify.
For more information about this tool, see the ksvalidator(1) man page.

Important

Keep in mind that the validation tool has its limitations. The Kickstart file can be very complicated; ksvalidator can make sure the syntax is correct and that the file does not include removed options, but it cannot guarantee the installation will be successful. It also does not attempt to validate the %pre, %post and %packages sections of the Kickstart file.

9.1.3. Making the Kickstart File Available

Once you create a Kickstart file, you can place it in one of the following locations:
  • On removable media, such as a DVD or USB flash drive connected to the installation system
  • On a hard drive connected to the installation system
  • On a network share reachable from the installation system
Normally, a Kickstart file is copied to removable media or a hard drive, or made available on the network. Placing the file in a network location complements the usual approach to Kickstart installations, which is also network-based: the system is booted using a PXE server, the Kickstart file is downloaded from a network share, and software packages specified in the file are downloaded from remote repositories.
TODO: link this with the PXE chapter, and maybe provide a procedure about how to create a new partition on a bootable USB with a netinst iso and put a Kickstart on it

9.1.4. Starting the Kickstart Installation

Once you have everything ready - you have created a valid Kickstart file and you have either local boot media or a PXE server available, you can start the Kickstart installation. You need to use the inst.ks= boot option either in the boot menu (when booting from local media), or add this option to your PXE server configuration. For information about boot options used in Kickstart installations, see Section 8.2.2, “Kickstart Boot Options”.

Chapter 10. Setting Up an Installation Server

Note

This appendix is intended for users with previous Linux experience. If you are a new user, you may want to install using minimal boot media or the distribution DVD instead.

10.1. PXE Installation Overview

Preboot Execution Environment, or PXE, is a techonology that allows computers to boot directly from resources provided over the network. Installing Fedora over the network means you don't have to create media, and you can install to multiple computers or virtual machine simultaneously. The process involves a number of components and features working together to provide the resources required.
PXE-capable computer
Most modern computers have the capability to network boot. Typically, a function key pressed during boot will bring up a boot selection menu. In environments designed for unattended administration, systems will often be configured to first attempt booting from the network, then boot from local storage, and the installation server is configured to only offer the installation when required. Your computer's manual will provide specific instructions on setting boot priorities.
DHCP Server
When a system requests an address during network booting, the DHCP server also provides the location of files to boot. A network should have only one DHCP server.
TFTP Server
Because the pre-boot environment is very simple, files must be provided in a very simple way. Trivial File Transfer Protocol, or TFTP, provides the system with the bootloader required to continue the installation process.
Bootloader
Because the job of booting an operating system is too complex for the pre-boot environment, a bootloader is used to load the kernel and related files. It also provides configuration information to the installer, and can offer a menu to select from different configurations.
Kernel and Initramfs
The kernel is the core of any Linux operating system, and the initramfs provides the kernel with required tools and resources. These files are also provided by tftp.
Package repository
A Fedora repository must be available for the installation. The example in this section uses the public Fedora mirrors as the repository source, but you can also use a repo on the local network provided by NFS, FTP, or HTTP.

Dump a link in here to the inst.repo option. Update the inst.repo option with examples if needed. --Pete

A link to mirrormanager and some instructions to other guides too. All the elaboration on installation methods might be going to far, but we can ref. --Pete

10.2. DHCP Server Configuration

Needs adminition about static IP, reference out to Networking Guide. Example assumes 192.168.1.2 for server.

Procedure 10.1. Installing and configuring dhcpd

  1. Install the dhcp server package.
    yum install dhcp
  2. Create a simple configuration for the dhcp server at /etc/dhcp/dhcpd.conf
    subnet 192.168.1.0 netmask 255.255.255.0 {
      authoritative;
      default-lease-time 600;
      max-lease-time 7200;
      ddns-update-style none;
                  
      option domain-name-servers 192.168.1.1;
      option routers 192.168.1.1;
                  
      }
    
  3. Test your configuration and address any problems you discover.
    systemctl start dhcpd
    journalctl --unit dhcpd --since -2m --follow
    
  4. Add entries to point clients to their bootloader and the server that provides it to your subnet configuration in /etc/dhcp/dhcpd.conf. Because DHCP clients provide the server with identifying information along with their address request, BIOS clients and UEFI clients can each be directed to the correct bootloader.
    subnet 192.168.1.0 netmask 255.255.255.0 {
      if option arch = 00:07 {
        filename "uefi/shim.efi";
       } else {
        filename "pxelinux/pxelinux.0";
       }
     
       next-server 192.168.1.2;
        
      ...
    
  5. Restart the dhcp service to check the configuration and make changes as needed.
    systemctl restart dhcpd
    journalctl --unit dhcpd --since -2m --follow
    

10.3. Installing the tftp server

Procedure 10.2. Installing the tftp server

  1. Install the tftp server package.
    yum install tftp-server
    
  2. Start and enable the tftp socket. systemd will automatically start the tftpd service when required.
    systemctl start tftp.socket
    systemctl enable tftp.socket
    

10.4. Providing and configuring bootloaders for PXE clients

Procedure 10.3. Getting the bootloader files

  1. Get the syslinux bootloader for BIOS clients.
    1. Install the syslinux package.
      yum install syslinux
      
    2. Create a directory for the bootloader files, and make them available there.
      mkdir -p /var/lib/tftpboot/pxelinux
      cp /usr/share/syslinux/{pxelinux.0,vesamenu.c32} /var/lib/tftpboot/pxelinux/
      
  2. Get the bootloader files for UEFI systems
    1. Install the shim and grub2-efi packages. If your server is a BIOS system, you must install the packages to a temporary install root. Installing them directly on a BIOS machine will attempt to configure the system for UEFI booting and cause problems.
      yum install shim grub2-efi --installroot=/tmp/fedora --releasever 20
      
    2. Create a directory for the bootloader files, and make them available there.
      mkdir -p /var/lib/tftpboot/uefi
      cp /tmp/fedora/boot/efi/EFI/fedora/{shim.efi,grubx64.efi} /var/lib/tftpboot/uefi/
      

Procedure 10.4. Configuring client bootloaders

  1. Create a boot menu for BIOS clients at /var/lib/tftpboot/pxelinux/default.
    needs adminition about kickstarts here somewhere, and testing of pulling .ks out of cgitNeed to check if the product media ships different or incompatible initramfsen
    default vesamenu.c32
    prompt 1
    timeout 600
    
    label linux
      menu label ^Install Fedora 20 64-bit
      menu default
      kernel f20/vmlinuz
      append initrd=f20/initrd.img ip=dhcp inst.repo=http://download.fedoraproject.org/pub/fedora/linux/releases/20/Everything/x86_64/os/
    
    label server
      menu label ^Install Fedora 20 Server
      menu default
      kernel f20/vmlinuz
      append initrd=f20/initrd.img ip=dhcp ks=https://git.fedorahosted.org/cgit/spin-kickstarts.git/plain/fedora-install-server.ks?h=f21
    
    label rescue
      menu label ^Rescue installed system
      kernel f20/vmlinuz
      append initrd=f20initrd.img rescue ip=dhcp root=live:http://dl.fedoraproject.org/pub/fedora/linux/releases/20/Fedora/x86_64/os/LiveOS/squashfs.img rescue
    
    label local
      menu label Boot from ^local drive
      localboot 0xffff
    
  2. Create a boot menu for UEFI clients at /var/lib/tftpboot/pxelinux/uefi.
    function load_video {
      insmod efi_gop
      insmod efi_uga
      insmod video_bochs
      insmod video_cirrus
      insmod all_video
      }
    
    load_video
    set gfxpayload=keep
    insmod gzio
    
    menuentry 'Install Fedora 64-bit'  --class fedora --class gnu-linux --class gnu --class os {
      linuxefi f20/vmlinuz ip=dhcp inst.repo=inst.repo=http://download.fedoraproject.org/pub/fedora/linux/releases/20/Everything/x86_64/os/
      initrdefi f20/initrd.img
      }
                        
    menuentry 'Install Fedora 20 Server'  --class fedora --class gnu-linux --class gnu --class os {
      kernel f20/vmlinuz
      append initrd=f20/initrd.img ip=dhcp ks=https://git.fedorahosted.org/cgit/spin-kickstarts.git/plain/fedora-install-server.ks?h=f21
      }
    
    menuentry 'Rescue installed system'  --class fedora --class gnu-linux --class gnu --class os {
      kernel f20/vmlinuz
      append f20/initrd=initrd.img rescue root=live:http://download.fedoraproject.org/pub/fedora/linux/releases/20/Fedora/x86_64/os/LiveOS/squashfs.img rescue
      }
    

10.5. Getting the kernel and initrd

Procedure 10.5. Downloading the kernel and initrd

  1. Create a directory for the files.
    mkdir -p /var/lib/tftpboot/f20
    
  2. Download the kernel.
    wget http://download.fedoraproject.org/pub/fedora/linux/releases/20/Fedora/x86_64/os/images/pxeboot/vmlinuz -o /var/lib/tftpboot/f20/vmlinuz
    
  3. Download the initrd
    wget http://download.fedoraproject.org/pub/fedora/linux/releases/20/Fedora/x86_64/os/images/pxeboot/initrd.img -o /var/lib/tftpboot/f20/initrd.img
    

10.6. Providing repositories

The examples in this section use the public Fedora mirrors as the package source. For faster installations, installing to many systems, or more isolated environments, you may wish to maintain a local repository.
Fedora Infrastructure maintains instructions for a configuring a local mirror at https://fedoraproject.org/wiki/Infrastructure/Mirroring. The preferred method for providing repositories is via HTTP, and you can refer to the Fedora System Administrator's Guide, available at Fedora Documentation, to configure httpd.

10.7. Advanced network installations with Cobbler

For more complex environments, Fedora offers the cobbler installation server. Tasks like managing kickstart configurtations, coordinating repositories, maintaining dns records, dhcp servers, and even puppet manifests are effectively automated by cobbler.
While levaraging all of the features provided by cobbler can be relatively simple, the full functionality of this powerful tool is too broad to be documented in this guide. The cobbler community provides excellent documentation at http://www.cobblerd.org/manuals/2.6.0/ to accompany the packages in the Fedora repository.

Chapter 11. Installing Using VNC

The graphical installation interface is the recommended method of installing Fedora. However, in some cases, accessing the graphical interface directly is difficult or impossible. Some systems lack the capability to connect a display and a keyboard, making VNC a necessity for manual (non-Kickstart) installations.
To allow manual installations on headless systems (systems without a directly connected display, keyboard and mouse), the Anaconda installation program includes a Virtual Network Computing (VNC) mode which allows the graphical mode of the installation program to run locally, but display on another system connected to the network. The VNC installation provides you with the full range of installation options.
This chapter provides instructions on activating VNC mode on the installation system and connecting to it using a VNC viewer.

11.1. Installing a VNC Viewer

Performing a VNC installation requires a VNC viewer running on your workstation or another terminal computer. VNC viewers are available in the repositories of most Linux distributions; free VNC viewers are also available for other operating systems such as Windows. On Linux systems, use your package manager to search for a viewer for your distribution.
The following VNC viewers are available in Fedora:
  • TigerVNC - A basic viewer independent of your desktop environment. Installed as the tigervnc package.
  • Vinagre - A viewer for the GNOME desktop environment. Installed as the vinagre package.
  • KRDC - A viewer integrated with the KDE desktop environment. Installed as the kdenetwork-krdc package.
To install any of the viewers listed above, execute the following command as root:
# yum install package
Replace package with the package name of the viewer you want to use (for example, tigervnc).

Note

Procedures in this chapter assume you are using TigerVNC as your VNC viewer. Specific instructions for other viewers may differ, but the general principles still apply.

11.2. Performing a VNC Installation

The Anaconda installation program offers two modes for VNC installation: Direct mode and Connect mode. The modes differ in the way the connection between the server and viewer is established. After you successfully connect, the installation will progress the same way regardless of the mode you used.
Direct Mode
In this mode, Anaconda is configured to start the installation and wait for an incoming connection from VNC viewer before proceeding. While waiting for an incoming connection, the system's IP address and the port on which the installer expects the connection is displayed on the display or console if available; this implies that you need at least a serial console to connect using this mode, but you can work around this limitation if you know the default VNC port and the system's IP address.
Connect Mode
In this mode, the VNC viewer is started on the remote system in listening mode. The VNC viewer waits for an incoming connection on a specified port. Then, Anaconda is started and the host name/IP address and port number of the viewer are provided using a boot option or a Kickstart command. When the installation begins, the installation program establishes a connection with the listening VNC viewer using the specified host name/IP address and port number. Connect mode is therefore easier to use on systems with no local display or console, but it also may require additional preparation, because the viewer system must be able to accept incoming connections on the specified port, which usually requires changing firewall settings.

11.2.1. Choosing a VNC Installation Mode

  • Visual and Interactive access to the system
    • If visual and interactive access to the system being installed is not available, then you should use Connect Mode.
  • Network Connection Rules and Firewalls
    • If the system being installed is not allowed inbound connections by a firewall, then you must use Connect Mode or disable the firewall. Disabling a firewall may have security implications.
    • If the remote system running the VNC viewer is not allowed incoming connections by a firewall, then you must use Direct Mode, or disable the firewall. Disabling a firewall may have security implications.

11.2.2. Installing in VNC Direct Mode

VNC Direct Mode is when the VNC viewer initiates a connection to the system being installed. Anaconda will tell you when to initiate this connection.

Procedure 11.1. Starting VNC in Direct Mode

  1. Open the VNC viewer (for example, TigerVNC) on the workstation you will be using to connect to the system being installed. A window similar to Figure 11.1, “TigerVNC Connection Details” will be displayed with an input field allowing you to specify an IP address.
    TigerVNC Connection Details

    Figure 11.1. TigerVNC Connection Details

  2. Boot the installation system and wait for the boot menu to appear. In the menu, edit boot options (see Section 3.3, “The Boot Menu”) and append the inst.vnc option to the end of the command line.
    Optionally, if you want to restrict VNC access to the installation system, add the inst.vncpassword=PASSWORD boot option as well. Replace PASSWORD with the password you want to use for the installation. The VNC password must be between 6 and 8 characters long.

    Important

    Use a temporary password for the inst.vncpassword= option. It should not be a real or root password you use on any system.
    Adding VNC Boot Options

    Figure 11.2. Adding VNC Boot Options

  3. Start the installation using the edited options. The system will initialize the installation program and start the necessary services. When the system is ready, you will see a message on the screen similar to the following:
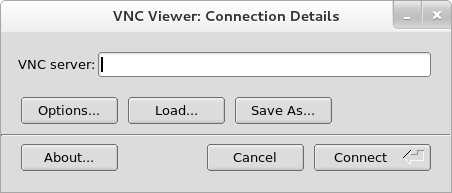
    13:14:47 Please manually connect your VNC viewer to 192.168.100.131:5901 to begin the install.
    
    Note the IP address and port number (in the above example, 192.168.100.131:5901).
  4. On the system running the VNC Viewer, enter the IP address and port number obtained in the previous step into the Connection Details dialog in the same format as it was displayed on the screen by the installer. Then, click Connect. The VNC viewer will now connect to the installation system. If you set up a VNC password, enter it when prompted and press OK.
When the connection is successfully established, a new window will open on the system running the VNC viewer, displaying the installation menu. This window will provide full remote access to the installer until the installation finishes and the system reboots for the first time.
You can then proceed with Chapter 4, Installing Using Anaconda.

11.2.3. Installing in VNC Connect Mode

VNC connect mode is when the system being installed initiates a connection to the VNC viewer running on a remote system. Before you start, make sure the remote system is configured to accept incoming connection on the port you want to use for VNC. The exact way to make sure the connection will not be blocked depends on your network and on your workstation's configuration. Information about configuring the firewall in Fedora is available in the Fedora Security Guide, available at Fedora Documentation.

Procedure 11.2. Starting VNC in Connect Mode

  1. Start the VNC viewer on the client system in listening mode. For example, on Fedora using TigerVNC, execute the following command:
    $ vncviewer -listen PORT
    
    Replace PORT with the port number you want to use for the connection.
    The terminal will display a message similar to the following example:

    Example 11.1. TigerVNC Viewer Listening

    TigerVNC Viewer 64-bit v1.3.0 (20130924)
    Built on Sep 24 2013 at 16:32:56
    Copyright (C) 1999-2011 TigerVNC Team and many others (see README.txt)
    See http://www.tigervnc.org for information on TigerVNC.
    
    Thu Feb 20 15:23:54 2014
     main:        Listening on port 5901
    
    When this message is displayed, the VNC viewer is ready and waiting for an incoming connection from the installation system.
  2. Boot the installation system and wait for the boot menu to appear. In the menu, edit boot options (see Section 3.3, “The Boot Menu”) and append the following options to the end of the command line:
    inst.vnc inst.vncconnect=HOST:PORT
    
    Replace HOST with the IP address of the system running the listening VNC viewer, and PORT with the port number that the VNC viewer is listening on.
  3. Start the installation. The system will initialize the installation program and start the necessary services. Once the initialization is finished, Anaconda will attempt to connect to the IP address and port you provided in the previous step.
    When the connection is successfully established, a new window will open on the system running the VNC viewer, displaying the installation menu. This window will provide full remote access to the installer until the installation finishes and the system reboots for the first time.
You can then proceed with Chapter 4, Installing Using Anaconda.

11.3. Kickstart Considerations

Commands for using a VNC installation are also available in Kickstart installations. Using just the vnc command will set up an installation using Direct Mode. Options are available to set up an installation using Connect Mode. For more information about the vnc command and options used in Kickstart files, see Appendix A, Kickstart Syntax Reference.

11.4. Considerations for Headless Systems

When installing headless systems, the only choices are an automated Kickstart installation or an interactive VNC installation using connect mode. For more information about automated Kickstart installation, see Appendix A, Kickstart Syntax Reference. The general process for an interactive VNC installation is described below.
  1. Set up a PXE server that will be used to start the installation. Information about installing and performing basic configurating of a PXE server can be found in Chapter 10, Setting Up an Installation Server.
  2. Configure the PXE server to use the boot options for a connect mode VNC installation. For information on these boot options, see Section 11.2.3, “Installing in VNC Connect Mode”.
  3. Follow the procedure for a VNC Installation using connect mode as described in the Procedure 11.2, “Starting VNC in Connect Mode”. However, when directed to boot the system, boot it from the PXE server as described in Section 3.2, “Booting from a Network”.

Chapter 12. Upgrading Your Current System

intro text

12.1. Automatic System Upgrade Using FedUp

text

12.2. Manual System Upgrade or Reinstallation

text

Part III. Technical Appendixes

The following appendixes do not contain instructions that tell you how to install Fedora. Instead, they provide technical background that you might find helpful to understand the options that Fedora offers you at various points in the installation process.

Table of Contents

A. Kickstart Syntax Reference
A.1. Installation Methods and Sources
A.1.1. device (optional) - Install Extra Device Drivers
A.1.2. driverdisk (optional) - Use a Driver Disk
A.1.3. install (required) - Configure Installation Method
A.1.4. mediacheck (optional) - Verify Installation Media Integrity
A.1.5. ostree - Install from an OSTree
A.1.6. repo (optional) - Configure Additional Yum Repositories
A.2. Storage and Partitioning
A.2.1. autopart (optional) - Automatic Partitioning
A.2.2. bootloader (required) - Configure Boot Loader
A.2.3. btrfs (optional) - Create Btrfs Volume or Subvolume
A.2.4. clearpart (optional) - Remove All Existing Partitions
A.2.5. fcoe (optional) - Configure Fibre Channel Over Ethernet Devices
A.2.6. ignoredisk (optional) - Ignore Specified Disks
A.2.7. iscsi (optional) - Configure iSCSI Devices
A.2.8. iscsiname (optional) - Assign Name to iSCSI Device
A.2.9. logvol (optional) - Create LVM Logical Volume
A.2.10. part (required) - Create Physical Partition
A.2.11. raid (optional) - Create Software RAID
A.2.12. volgroup (optional) - Create LVM Volume Group
A.2.13. zerombr (optional) - Reinitialize Partition Tables
A.2.14. zfcp (optional) - Configure Fibre Channel Device
A.3. Network Configuration
A.3.1. firewall (optional) - Configure Firewall
A.3.2. network (optional) - Configure Network Interfaces
A.4. Console and Environment
A.4.1. keyboard (optional) - Configure Keyboard Layouts
A.4.2. lang (optional) - Configure Language During Installation
A.4.3. services (optional) - Configure Services
A.4.4. skipx (optional) - Do Not Configure X Window System
A.4.5. timezone (optional) - Configure Time Zone
A.4.6. xconfig (optional) - Configure X Window System
A.5. Users, Groups and Authentication
A.5.1. auth or authconfig (optional) - Configure Authentication
A.5.2. group (optional) - Create User Group
A.5.3. realm (optional) - Join an Active Directory or IPA Domain
A.5.4. rootpw (required) - Set Root Password
A.5.5. selinux (optional) - Configure SELinux
A.5.6. user (optional) - Create User Account
A.6. Installation Environment
A.6.1. autostep (optional) - Go Through Every Screen
A.6.2. cmdline (optional) - Perform Installation in Command Line Mode
A.6.3. graphical (optional) - Perform Installation in Graphical Mode
A.6.4. logging (optional) - Configure Error Logging During Installation
A.6.5. rescue (optional) - Rescue Mode
A.6.6. sshpw (optional) - Restrict ssh Access During Installation
A.6.7. text (optional) - Perform Installation in Text Mode
A.6.8. unsupported_hardware (optional) - Suppress Unsupported Hardware Alerts
A.6.9. vnc (optional) - Configure VNC Access
A.7. After the Installation
A.7.1. eula (optional) - Accept the License Agreement
A.7.2. firstboot (optional) - Enable or Disable Initial Setup
A.7.3. halt (optional) - Halt System After Installation
A.7.4. poweroff (optional) - Power Off After Installation
A.7.5. reboot (optional) - Reboot After Installation
A.7.6. shutdown (optional) - Shut Down After Installation
A.8. %include (optional) - Include Contents of Another File
A.9. %ksappend (optional) - Append Contents of Another File
A.10. %packages (required) - Package Selection
A.11. %pre (optional) - Pre-installation Script
A.12. %post (optional) - Post-installation Script
A.13. Example Kickstart Configurations
A.13.1. Advanced Partitioning Example
A.13.2. Example Pre-installation Script
A.13.3. Example Post-installation Script

Kickstart Syntax Reference

This appendix describes commands and options available in Kickstart installations. For general information about Kickstart, see Chapter 9, Automating the Installation with Kickstart.

Important

Device names are not guaranteed to be consistent across reboots, which can complicate usage in Kickstart scripts. When a Kickstart option calls for a device node name (such as sda), you can instead use any item from /dev/disk. For example, instead of:
part / --fstype=xfs --onpart=sda1
You could use an entry similar to one of the following:
part / --fstype=xfs --onpart=/dev/disk/by-path/pci-0000:00:05.0-scsi-0:0:0:0-part1
part / --fstype=xfs --onpart=/dev/disk/by-id/ata-ST3160815AS_6RA0C882-part1
This provides a consistent way to refer to disks that is more meaningful than just sda. This is especially useful in large storage environments.
While the general principles of Kickstart installations tend to stay the same, the commands and options can change between major releases. You can use the ksverdiff command to display the differences between two versions of the Kickstart syntax. This is useful when updating an existing Kickstart file to be used with a new release. To display a list of changes in syntax between Fedora 19 and 20, use the following command:
$ ksverdiff -f F19 -t F20
The -f option specifies the release to start the comparison with, and the -t option to specify the release to end with. For additional information, see the ksverdiff(1) man page. Also note that you can not use this to display changes in a release that is newer than your system - the version of pykickstart on Fedora 19 can not display changes in Fedora 20.
Additionally, you can review the Fedora 20 Release Notes, available at Fedora Documentation, for a list of changes.

Note

In the following sections, if an option is followed by an equals mark (=), a value must be specified after it. In the example commands, options in square brackets ([ ]) are optional arguments for the command.

A.1. Installation Methods and Sources

The following commands control the way Fedora will be installed.

A.1.1. device (optional) - Install Extra Device Drivers

On most PCI systems, the installation program will automatically detect Ethernet and SCSI cards. However, on older systems and some PCI systems, Kickstart requires a hint to find the proper devices. The device command, which tells the installation program to install extra modules, uses the following format:
device moduleName [--opts=]
Replace moduleName with the name of the kernel module which should be installed.
--opts=
Options to pass to the installed kernel module. For example:
device i2c_piix4 --opts="aic152x=0x340 io=11"

A.1.2. driverdisk (optional) - Use a Driver Disk

Driver disks can be used during Kickstart installations to provide additional drivers not included by default. You must copy the driver disks's contents to the root directory of a partition on the system's hard drive. Then, you must use the driverdisk command to specify that the installation program should look for a driver disk and its location.
driverdisk partition | --source= | --biospart=
partition
Search for the driver disk image on a local partition. Replace partition with the name of the partition containing the driver disk. Note that the partition must be specified as a full path. For example:
driverdisk /dev/sdb1
--source=
Search for the driver disk in a network location instead of a local partition. For example:
driverdisk --source=ftp://path/to/dd.img
driverdisk --source=http://path/to/dd.img
driverdisk --source=nfs:hostname:/path/to/dd.img
--biospart=
BIOS partition containing the driver disk (for example, 82p2).

A.1.3. install (required) - Configure Installation Method

The default installation mode. You must specify the type of installation from cdrom, harddrive, nfs, liveimg, or url. The install command and the installation method command must be on separate lines. For example:
install
liveimg --url=file:///images/install/squashfs.img --noverifyssl
The installation method commands are:
cdrom
Install from the first optical (DVD) drive on the system.
harddrive
Install from a tree or full installation ISO image on a local hard drive. The tree or ISO image must be on a file system which is mountable in the installation environment. Supported file systems are ext2, ext3, ext4, vfat, or xfs.
install
harddrive --partition= | --biospart= [--dir=]
--partition=
Partition to install from (such as sdb2).
--biospart=
BIOS partition to install from (such as 82p2).
--dir=
Directory containing the installation tree or ISO image.
liveimg
Install from a disk image instead of packages. The image can be the squashfs.img file from a live ISO image, or any file system that the installation media can mount. Supported file systems are ext2, ext3, ext4, vfat, and xfs.
install
liveimg --url= [--proxy= | --checksum= | --noverifyssl=]
--url=
The location to install from. Supported protocols are HTTP, HTTPS, FTP, and file.
--proxy=
Specify an HTTP, HTTPS or FTP proxy to use while performing the installation.
--checksum=
An optional argument with the SHA256 checksum of the image file, used for integrity verification. If you are using a live image provided by Fedora Project, you can find a list of checksums at https://fedoraproject.org/en/verify.
--noverifyssl
Disable SSL verification when connecting to an HTTPS server.
nfs
Install from an NFS server specified. TODO: link to the PXE chapter's section on preparing install source on nfs
install
nfs --server= [--dir=] [--opts= ]
--server=
Host name of the server.
--dir=
Directory containing the installation tree or ISO image.
--opts=
Mount options to use for mounting the NFS export.
url
Install from a tree on a remote server via HTTP, HTTPS, or FTP.
install
url --url= | --mirrorlist= [--proxy= | --noverifyssl]
--url=
The location to install from. Supported protocols are http, https, ftp, and file.
--mirrorlist=
The mirror URL to install from.
--proxy=
Specify an HTTP, HTTPS or FTP proxy to use while performing the installation.
--noverifyssl
Disable SSL verification when connecting to an HTTPS server.

A.1.4. mediacheck (optional) - Verify Installation Media Integrity

This command will force the installation program to perform a media check before starting the installation, similarly to the rd.live.check boot option (see Section 8.5.2, “Verifying Boot Media”. This command requires that installations be attended, so it is disabled by default.

A.1.5. ostree - Install from an OSTree

text

A.1.6. repo (optional) - Configure Additional Yum Repositories

Configures additional Yum repositories that may be used as sources for package installation. This command can be used multiple times in a single Kickstart file.
repo --name=repoid [--baseurl=<url>|--mirrorlist=url] [options]
See the Fedora System Administrator's Guide, available at Fedora Documentation, for information about the Yum package manager.

Important

Repositories used for installation must be stable. The installation may fail if a repository is modified before the installation concludes.
--name=
The repository ID. This option is required. If a repository has a name which conflicts with another previously added repository, it will be ignored. Because the installation program uses a list of pre-configured repositories, this means that you cannot add repositories with the same names as the preconfigured ones.
--baseurl=
The repository URL. The variables that may be used in Yum repo configuration files are not supported. You may use one of either this option or --mirrorlist, not both.
--mirrorlist=
The URL pointing at a list of mirrors for the repository. The variables that may normally be used in yum repository configuration files are not supported here. You may use one of either this option or --baseurl, not both.
--cost=
An integer value to assign a cost to this repository. If multiple repositories provide the same packages, this number will be used to prioritize which repository will be used before another. Repositories with a lower cost take priority over repositories with higher cost.
--excludepkgs=
A comma-separated list of package names that must not be pulled from this repository. This is useful if multiple repositories provide the same package and you want to make sure it comes from a particular repository. Both full package names (such as publican) and globs (such as gnome-*) are accepted.
--includepkgs=
A comma-separated list of package names and globs that must be pulled from this repository. This is useful if multiple repositories provide the same package and you want to make sure it comes from this repository.
--proxy=
Specify an HTTP, HTTPS or FTP proxy server to use when accessing this repository. This setting does not affect any other repositories or installation sources.
--ignoregroups=true
This option is used when composing installation trees and has no effect on the installation process itself. It tells the compose tools to not look at the package group information when mirroring trees so as to avoid mirroring large amounts of unnecessary data.
--noverifyssl
Disable SSL verification when connecting to an HTTPS server.

A.2. Storage and Partitioning

Commands in this section are used to determine your system's storage options and partitioning.

A.2.1. autopart (optional) - Automatic Partitioning

Automatically creates partitions: a root (/) partition (1 GB or larger), a swap partition, and an appropriate /boot partition for the architecture. On large enough drives (50 GB and larger), this also creates a /home partition.
autopart --type=type [--nolvm | --encrypted | --passphrase= | --escrowcert= | --backuppassphrase | --cipher=]

Important

The autopart option cannot be used together with the part/partition, raid, logvol, or volgroup options in the same Kickstart file.
--type=
Selects one of the predefined automatic partitioning schemes you want to use. Accepts the following values:
  • lvm: The LVM partitioning scheme.
  • btrfs: The Btrfs partitioning scheme.
  • plain: Regular partitions with no LVM or Btrfs.
  • thinp: The LVM Thin Provisioning partitioning scheme.
For a description of the available partition schemes, see TODO: xref to a list of available auto partitioning schemes
--nolvm
Do not use LVM or Btrfs for automatic partitioning. This option is equal to --type=plain.
--encrypted
Encrypts all partitions. This is equivalent to checking the Encrypt partitions check box on the initial partitioning screen during a manual graphical installation.
--passphrase=
Provides a default system-wide passphrase for all encrypted devices.
--escrowcert=URL_of_X.509_certificate
Stores data encryption keys of all encrypted volumes as files in /root, encrypted using the X.509 certificate from the URL specified with URL_of_X.509_certificate. The keys are stored as a separate file for each encrypted volume. This option is only meaningful if --encrypted is specified.
--backuppassphrase
Adds a randomly-generated passphrase to each encrypted volume. Store these passphrases in separate files in /root, encrypted using the X.509 certificate specified with --escrowcert. This option is only meaningful if --escrowcert is specified.
--cipher=
Specifies which type of encryption will be used if the Anaconda default aes-xts-plain64 is not satisfactory. You must use this option together with the --encrypted option; by itself it has no effect. Available types of encryption are listed in the Fedora Security Guide, available at Fedora Documentation. Using either aes-xts-plain64 or aes-cbc-essiv:sha256 is strongly recommended.

A.2.2. bootloader (required) - Configure Boot Loader

Specifies how the boot loader should be installed.
bootloader [--append= | --boot-drive= | --leavebootorder | --driveorder= | --location= | --password= | --iscrypted | --timeout= | --default= | --extlinux]

Important

You should always use a password to protect your boot loader. An unprotected boot loader can allow a potential attacker to modify the system's boot options and gain unauthorized access to the system.

Important

Some systems require a special partition for installing the boot loader. The type and size of this partition depends on whether the disk you are installing the boot loader to uses the Master Boot Record (MBR) or a GUID Partition Table (GPT) schema. For more information, see TODO: link to a section that deals with boot loaders and EFI/BIOSBoot
--append=
Specifies additional kernel parameters. To specify multiple parameters, separate them with spaces. For example:
bootloader --location=mbr --append="hdd=ide-scsi ide=nodma"
The rhgb and quiet parameters are always used, even if you do not specify them here or do not use the --append= command at all.
--boot-drive=
Specifies which drive the boot loader should be written to, and therefore which drive the computer will boot from.

Important

The --boot-drive= option is currently being ignored in Fedora installations on IBM System z systems using the zipl boot loader. When zipl is installed, it determines the boot drive on its own.
--leavebootloader
Prevents the installation program from making changes to the existing list of bootable images on UEFI or ISeries/PSeries systems.
--driveorder=
Specifies which drive is first in the BIOS boot order. For example:
bootloader --driveorder=sda,hda
--location=
Specifies where the boot record is written. Valid values are the following:
  • mbr - The default option. Depends on whether the drive uses the Master Boot Record (MBR) or GUID Partition Table (GPT) scheme:
    • On a GPT-formatted disk, this option will install stage 1.5 of the boot loader into the BIOS boot partition.
    • On an MBR-formatted disk, stage 1.5 will be installed into the empty space between the MBR and the first partition.
  • partition - Install the boot loader on the first sector of the partition containing the kernel.
  • none - Do not install the boot loader.
In most cases, this option does not need to be specified.
--password=
If using GRUB2 as the boot loader, sets the boot loader password to the one specified with this option. This should be used to restrict access to the GRUB2 shell, where arbitrary kernel options can be passed.
If a password is specified, GRUB2 will also ask for a user name. The user name is always root.
--iscrypted
Normally, when you specify a boot loader password using the --password= option, it will be stored in the Kickstart file in plain text. If you want to encrypt the password, use this option and an encrypted password.
To generate an encrypted password, use the grub2-mkpasswd-pbkdf2 command, enter the password you want to use, and copy the command's output (the hash starting with grub.pbkdf2) into the Kickstart file. An example bootloader Kickstart entry with an encrypted password will look similar to the following:
bootloader --iscrypted --password=grub.pbkdf2.sha512.10000.5520C6C9832F3AC3D149AC0B24BE69E2D4FB0DBEEDBD29CA1D30A044DE2645C4C7A291E585D4DC43F8A4D82479F8B95CA4BA4381F8550510B75E8E0BB2938990.C688B6F0EF935701FF9BD1A8EC7FE5BD2333799C98F28420C5CC8F1A2A233DE22C83705BB614EA17F3FDFDF4AC2161CEA3384E56EB38A2E39102F5334C47405E
--timeout=
Specifies the amount of time the boot loader will wait before booting the default option (in seconds).
--default=
Sets the default boot image in the boot loader configuration.
--extlinux
Use the extlinux boot loader instead of GRUB2. This option only works on systems supported by extlinux.

A.2.3. btrfs (optional) - Create Btrfs Volume or Subvolume

Create a Btrfs volume or subvolume. For a volume, the syntax is:
btrfs mntpoint --data=level --metadata=level [--label=] partitions
One or more partitions can be specified in partitions. When specifying more than one partitions, the entries must be separated by a single space. See Example A.1, “Creating Btrfs Volumes and Subvolumes” for a demonstration.
For a subvolume, the syntax is:
btrfs mntpoint --subvol --name=name parent
parent should be the identifier of the subvolume's parent volume, name with a name for the subvolume, and mntpoint is the location where the file system is mounted.
--data=
RAID level to use for file system data (such as 0, 1, or 10). This parameter is optional and has no meaning for subvolumes.
--metadata=
RAID level to use for file system/volume metadata (such as 0, 1, or 10). This parameter is optional and has no meaning for subvolumes.
--label=
Specify a label for the Btrfs file system. If the given label is already in use by another file system, a new label will be created. This option has no meaning for subvolumes.
--subvol
Create a Btrfs subvolume instead of a volume.
--name=
Set a name for a Btrfs subvolume.
--noformat or --useexisting
Use an existing Btrfs volume (or subvolume) and do not reformat the file system.
The following example shows how to create a Btrfs volume from member partitions on three disks with subvolumes for / and /home. The main volume is not mounted or used directly in this example.

Example A.1. Creating Btrfs Volumes and Subvolumes

part btrfs.01 --size=6000 --ondisk=sda
part btrfs.02 --size=6000 --ondisk=sdb
part btrfs.03 --size=6000 --ondisk=sdc

btrfs none --data=0 --metadata=1 --label=f20 btrfs.01 btrfs.02 btrfs.03
btrfs / --subvol --name=root LABEL=f20
btrfs /home --subvol --name=home f20

A.2.4. clearpart (optional) - Remove All Existing Partitions

Removes partitions from the system, prior to creation of new partitions. By default, no partitions are removed.
clearpart [--all | --drives= | --list= | --linux | --none]

Note

If the clearpart command is used, then the part --onpart command cannot be used on a logical partition.
For a detailed example of partitioning including the clearpart command, see Section A.13.1, “Advanced Partitioning Example”.
--all
Erases all partitions from the system.
--drives=
Specifies which drives to clear partitions from. For example, the following clears all the partitions on the first two drives on the primary IDE controller:
clearpart --drives=hda,hdb --all
To clear a multipath device, use the format disk/by-id/scsi-WWID, where WWID is the world-wide identifier for the device. For example, to clear a disk with WWID 58095BEC5510947BE8C0360F604351918, use:
clearpart --drives=disk/by-id/scsi-58095BEC5510947BE8C0360F604351918
This format is preferable for all multipath devices, but if errors arise, multipath devices that do not use logical volume management (LVM) can also be cleared using the format disk/by-id/dm-uuid-mpath-WWID, where WWID is the world-wide identifier for the device. For example, to clear a disk with WWID 2416CD96995134CA5D787F00A5AA11017, use:
clearpart --drives=disk/by-id/dm-uuid-mpath-2416CD96995134CA5D787F00A5AA11017

Warning

Never specify multipath devices by device names like mpatha. Device names such as this are not specific to a particular disk. The disk named /dev/mpatha during installation might not be the one that you expect it to be. Therefore, the clearpart command could target the wrong disk.
--list=
Specifies which partitions to clear. This option overrides the --all and --linux options if used. Can be used across different drives. For example:
clearpart --list=sda2,sda3,sdb1
--linux
Erases all Linux partitions.
--none
Do not remove any partitions. This is the default behavior - using this option is the same as not using the clearpart command at all.

Note

Using the clearpart --all command in a Kickstart file to remove all existing partitions during the installation will cause Anaconda to pause and prompt you for a confirmation. If you need to perform the installation automatically with no interaction, add the zerombr command to your Kickstart file.

A.2.5. fcoe (optional) - Configure Fibre Channel Over Ethernet Devices

Specify which FCoE devices should be activated automatically in addition to those discovered by Enhanced Disk Drive Services (EDD).
fcoe --nic=name [--dcp= | --autovlan]
--nic= (required)
Name of the device to be activated.
--dcb=
Establish Data Center Bridging (DCB) settings.
--autovlan
Discover VLANs automatically.

A.2.6. ignoredisk (optional) - Ignore Specified Disks

Causes the installation program to ignore the specified disks. This is useful if you use autopartition and want to be sure that some disks are ignored. For example, without ignoredisk, attempting to deploy on a SAN cluster the Kickstart would fail, as the installation program detects passive paths to the SAN that return no partition table.
ignoredisk --drives= | --only-use= [--interactive]
--drives=
Specify one or more drives to ignore. Multiple drives can be specified as a comma-separated list. For example:
ignoredisk --drives=sda,sdc
To ignore a multipath device that does not use logical volume management (LVM), use the format disk/by-id/dm-uuid-mpath-WWID, where WWID is the world-wide identifier for the device. For example, to ignore a disk with WWID 2416CD96995134CA5D787F00A5AA11017, use:
ignoredisk --drives=disk/by-id/dm-uuid-mpath-2416CD96995134CA5D787F00A5AA11017
Multipath devices that use LVM are not assembled until after Anaconda has parsed the Kickstart file. Therefore, you cannot specify these devices in the format dm-uuid-mpath. Instead, to ignore a multipath device that uses LVM, use the format disk/by-id/scsi-WWID, where WWID is the world-wide identifier for the device. For example, to ignore a disk with WWID 58095BEC5510947BE8C0360F604351918, use:
ignoredisk --drives=disk/by-id/scsi-58095BEC5510947BE8C0360F604351918

Warning

Never specify multipath devices by device names like mpatha. Device names such as this are not specific to a particular disk. The disk named /dev/mpatha during installation might not be the one that you expect it to be. Therefore, the clearpart command could target the wrong disk.
--only-use=
Specifies a list of disks for the installation program to use. All other disks are ignored. For example, to use disk sda during installation and ignore all other disks:
ignoredisk --only-use=sda
To include a multipath device that does not use LVM:
ignoredisk --only-use=disk/by-id/dm-uuid-mpath-2416CD96995134CA5D787F00A5AA11017
To include a multipath device that uses LVM:
ignoredisk --only-use=disk/by-id/scsi-58095BEC5510947BE8C0360F604351918
--interactive
Allows you to manually navigate the advanced storage screen.

A.2.7. iscsi (optional) - Configure iSCSI Devices

Specifies additional iSCSI storage to be attached during installation. If you use the iscsi command, you must also assign a name to the iSCSI node, using the iscsiname command (see Section A.2.8, “iscsiname (optional) - Assign Name to iSCSI Device”. The iscsiname command must appear before the iscsi command in the Kickstart file.
You should configure iSCSI storage in the system BIOS or firmware (iBFT for Intel systems) rather than use the iscsi command if possible. If you do so, Anaconda automatically detects and uses disks configured in BIOS or firmware and no special configuration is necessary in the Kickstart file.
If you must use the iscsi command, make sure that networking is activated at the beginning of the installation, and that the iscsi command appears in the Kickstart file before you refer to iSCSI disks with commands such as clearpart or ignoredisk.
iscsi --ipaddr= --port= [--target= | --iface= | --user= | --password= | --reverse-user= | --reverse-password=]
--ipaddr=
The IP address of the target to connect to.
--port=
The port number (typically 3260).
--target=
Target IQN (iSCSI Qualified Name).
--iface=
Bind the connection to a specific network interface instead of using the default one determined by the network layer. Once used, it must be specified in all instances of the iscsi command in the entire Kickstart file.
--user=
User name required to authenticate with the target.
--password=
Password that corresponds with the user name specified for the target.
--reverse-user=
User name required to authenticate with the initiator from a target using reverse CHAP authentication.
--reverse-password=
Password that corresponds with the user name specified for the initiator.

A.2.8. iscsiname (optional) - Assign Name to iSCSI Device

Assigns a name to an iSCSI node specified by the iscsi command (Section A.2.7, “iscsi (optional) - Configure iSCSI Devices”). This command is mandatory if you use the iscsi command, and it must be specified before you use iscsi.
iscsiname iqn

A.2.9. logvol (optional) - Create LVM Logical Volume

Create a logical volume for Logical Volume Management (LVM) with the syntax:
logvol mntpoint --vgname= --name= [options]

Note

Do not use the dash (-) character in logical volume and volume group names when installing Fedora using Kickstart. If this character is used, the installation will finish normally, but the /dev/mapper/ directory will list these volumes and volume groups with every dash doubled. For example, a volume group named volgrp-01 containing a logical volume named logvol-01 will be listed as /dev/mapper/volgrp--01-logvol--01.
This limitation only applies to newly created logical volume and volume group names. If you are reusing existing ones using the --noformat or --useexisting option, their names will not be changed.
For a detailed example of logvol in action, see Section A.13.1, “Advanced Partitioning Example”.
mntpoint
Replace with the volume's mount point. This name can take the following forms:
/path
A path to the mount point - for example, / or /home
swap
The partition is used as swap space.
To determine the size of the swap partition automatically, use the --recommended option:
swap --recommended
The size assigned will be effective but not precisely calibrated for your system.
To determine the size of the swap partition automatically but also allow extra space for your system to hibernate, use the --hibernation option:
swap--hibernation
The size assigned will be equivalent to the swap space assigned by --recommended plus the amount of RAM on your system.
For the swap sizes assigned by these commands, see todo: xref to a section about swap sizes
none
Used only when creating a thin pool volume.
--noformat
Use an existing logical volume and do not format it.
--useexisting
Use an existing logical volume and format it.
--fstype=
Sets the file system type for the logical volume. Valid values are xfs, ext2, ext3, ext4, swap, and vfat. For information about file system types, see TODO: xref to info about fs types
--fsoptions=
Specifies a free form string of options to be used when mounting the filesystem. This string will be copied into the /etc/fstab file of the installed system and should be enclosed in quotes. For example:
--fsoptions="ro, x-systemd.device-timeout=0"
--label=
Sets a label for the logical volume.
--grow
Grow the volume to fill available space (if any), or up to the limit set by the --maxsize= option.
--size=
The minimum size of the logical volume in megabytes. This option is mandatory when creating a new logical volume, and optional if you are reusing an existing logical volume using the --useexisting or --noformat option.
--maxsize=
The maximum size in megabytes when the logical volume is set to grow. Specify an integer value here such as 500 (do not include the unit).
--recommended
Determine the size of the logical volume automatically. For details about the recommended scheme, see TODO: xref to section with partitioning recommendations
--resize
Resize an existing logical volume. If you use this option, you must also specify --useexisting and --size.
--percent=
Specify the amount by which to grow the logical volume, as a percentage of the free space in the volume group after any statically-sized logical volumes are taken into account. This option must be used in conjunction with the --size and --grow options.
--encrypted
Specifies that this logical volume should be encrypted, using the passphrase provided in the --passphrase= option. If you do not specify a passphrase, the installation program will use the default, system-wide passphrase set with the autopart --passphrase command, or stop the installation and prompt you to provide a passphrase if no default is set.
--passphrase=
Specifies the passphrase to use when encrypting this logical volume. You must use this option together with the --encrypted option. This option has no effect by itself.
--cipher=
Specifies which type of encryption will be used if the Anaconda default aes-xts-plain64 is not satisfactory. You must use this option together with the --encrypted option; by itself it has no effect. Available types of encryption are listed in the Fedora Security Guide, available at Fedora Documentation. Using either aes-xts-plain64 or aes-cbc-essiv:sha256 is strongly recommended.
--escrowcert=URL_of_X.509_certificate
Store data encryption keys of all encrypted volumes as files in /root, encrypted using the X.509 certificate from the URL specified with URL_of_X.509_certificate. The keys are stored as a separate file for each encrypted volume. This option is only meaningful if --encrypted is specified.
--backuppassphrase
Add a randomly-generated passphrase to each encrypted volume. Store these passphrases in separate files in /root, encrypted using the X.509 certificate specified with --escrowcert. This option is only meaningful if --escrowcert is specified.
--thinpool
Creates a thin pool logical volume. (Use a mount point of none)
--metadatasize=
Metadata area size (in MiB) for a new thin pool device.
--chunksize=
Chunk size (in KiB) for a new thin pool device.
--thin
Create a thin logical volume. (Requires use of --poolname)
--poolname=
Specify the name of the thin pool in which to create a thin logical volume. Requires the --thin option.
Create one or more partitions first using Section A.2.10, “part (required) - Create Physical Partition”, create the logical volume group (Section A.2.12, “volgroup (optional) - Create LVM Volume Group”), and then create logical volumes. For example:
part pv.01 --size 3000
volgroup myvg pv.01
logvol / --vgname=myvg --size=2000 --name=rootvol

A.2.10. part (required) - Create Physical Partition

Creates a partition on the system.
For a detailed example of part in action, see Section A.13.1, “Advanced Partitioning Example”.
part|partition mntpoint --name=name --device=device --rule=rule [options]

Warning

All partitions created are formatted as part of the installation process unless --noformat and --onpart= are used.

Note

If partitioning fails for any reason, diagnostic messages appear on virtual console 3.
mntpoint
Where the partition is mounted. The value must be of one of the following:
/path
A path to the mount point - for example, / or /home
swap
The partition is used as swap space.
To determine the size of the swap partition automatically, use the --recommended option:
swap --recommended
The size assigned will be effective but not precisely calibrated for your system.
To determine the size of the swap partition automatically but also allow extra space for your system to hibernate, use the --hibernation option:
swap--hibernation
The size assigned will be equivalent to the swap space assigned by --recommended plus the amount of RAM on your system.
For the swap sizes assigned by these commands, see todo: xref to a section about swap sizes
raid.id
The partition is used for software RAID (see raid).
pv.id
biosboot
The partition will be used for a BIOS Boot partition. A 1 MB BIOS boot partition is necessary on BIOS-based systems using a GUID Partition Table (GPT); the boot loader will be installed into it. It is not necessary on UEFI systems. Also see Section A.2.10, “part (required) - Create Physical Partition”.
efi
An EFI System Partition. An EFI partition at least 50 MB in size is necessary on UEFI-based systems; the recommended size is 200 MB. It is not necessary on BIOS systems. Also see Section A.2.10, “part (required) - Create Physical Partition”.
--size=
The minimum partition size in megabytes. Specify an integer value here such as 500 (do not include the unit).

Important

If the --size value is too small, the installation will fail. Set the --size value as the minimum amount of space you require. For size recommendations, see TODO: xref to recommended partitioning scheme .
--maxsize=
The maximum partition size in megabytes when the partition is set to grow. Specify an integer value here such as 500 (do not include the unit).
--resize
Resize an existing partition. When using this option, specify the new size (in megabytes) using the --size= option and the target partition using the --onpart= option.
--grow
Tells the partition to grow to fill available space (if any), or up to the maximum size setting.

Note

If you use --grow= without setting --maxsize= on a swap partition, Anaconda will limit the maximum size of the swap partition. For systems that have less than 2 GB of physical memory, the imposed limit is twice the amount of physical memory. For systems with more than 2 GB, the imposed limit is the size of physical memory plus 2 GB.
--noformat
Specifies that the partition should not be formatted, for use with the --onpart command.
--onpart= or --usepart=
Specifies the device on which to place the partition. For example:
partition /home --onpart=hda1
The above puts /home on /dev/hda1.
These options can also add a partition to a logical volume. For example:
partition pv.1 --onpart=hda2
The device must already exist on the system; the --onpart option will not create it.
--ondisk= or --ondrive=
Forces the partition to be created on a particular disk. For example, --ondisk=sdb puts the partition on the second SCSI disk on the system.
To specify a multipath device that does not use logical volume management (LVM), use the format disk/by-id/dm-uuid-mpath-WWID, where WWID is the world-wide identifier for the device. For example, to specify a disk with WWID 2416CD96995134CA5D787F00A5AA11017, use:
part / --fstype=xfs --grow --asprimary --size=8192 --ondisk=disk/by-id/dm-uuid-mpath-2416CD96995134CA5D787F00A5AA11017
Multipath devices that use LVM are not assembled until after Anaconda has parsed the Kickstart file. Therefore, you cannot specify these devices in the format dm-uuid-mpath. Instead, to specify a multipath device that uses LVM, use the format disk/by-id/scsi-WWID, where WWID is the world-wide identifier for the device. For example, to specify a disk with WWID 58095BEC5510947BE8C0360F604351918, use:
part / --fstype=xfs --grow --asprimary --size=8192 --ondisk=disk/by-id/scsi-58095BEC5510947BE8C0360F604351918

Warning

Never specify multipath devices by device names like mpatha. Device names such as this are not specific to a particular disk. The disk named /dev/mpatha during installation might not be the one that you expect it to be. Therefore, the clearpart command could target the wrong disk.
--asprimary
Forces the partition to be allocated as a primary partition. If the partition cannot be allocated as primary (usually due to too many primary partitions being already allocated), the partitioning process will fail. For information about primary partitions, see TODO: xref to an appendix about partitions or something like that
--fsprofile=
Specifies a usage type to be passed to the program that makes a filesystem on this partition. A usage type defines a variety of tuning parameters to be used when making a filesystem. For this option to work, the filesystem must support the concept of usage types and there must be a configuration file that lists valid types. For ext2, ext3, ext4, this configuration file is /etc/mke2fs.conf.
--fstype=
Sets the file system type for the partition. Valid values are xfs, ext2, ext3, ext4, swap, vfat, efi and biosboot. For information about supported file systems, see TODO: xref to something about supported fs types
--fsoptions=
Specifies a free form string of options to be used when mounting the filesystem. This string will be copied into the /etc/fstab file of the installed system and should be enclosed in quotes. For example:
--fsoptions="ro, x-systemd.device-timeout=0"
--label=
Assign a label to an individual partition.
--recommended
Determine the size of the partition automatically. For details about the recommended scheme, see TODO: xref to something about recommended partitioning scheme
--onbiosdisk
Forces the partition to be created on a particular disk as discovered by the BIOS.
--encrypted
Specifies that this partition should be encrypted, using the passphrase provided in the --passphrase option. If you do not specify a passphrase, Anaconda uses the default, system-wide passphrase set with the autopart --passphrase command, or stops the installation and prompts you to provide a passphrase if no default is set.
--passphrase=
Specifies the passphrase to use when encrypting this partition. You must use this option together with the --encrypted option; by itself it has no effect.
--cipher=
Specifies which type of encryption will be used if the Anaconda default aes-xts-plain64 is not satisfactory. You must use this option together with the --encrypted option; by itself it has no effect. Available types of encryption are listed in the Fedora Security Guide, available at Fedora Documentation. Using either aes-xts-plain64 or aes-cbc-essiv:sha256 is strongly recommended.
--escrowcert=URL_of_X.509_certificate
Stores data encryption keys of all encrypted volumes as files in /root, encrypted using the X.509 certificate from the URL specified with URL_of_X.509_certificate. The keys are stored as a separate file for each encrypted volume. This option is only meaningful if --encrypted is specified.
--backuppassphrase
Add a randomly-generated passphrase to each encrypted partition. Store these passphrases in separate files in /root, encrypted using the X.509 certificate specified with --escrowcert. This option is only meaningful if --escrowcert is specified.

A.2.11. raid (optional) - Create Software RAID

Assembles a software RAID device. This command is of the form:
raid mntpoint --level=level --device=mddevice partitions*
For a detailed example of raid in action, see Section A.13.1, “Advanced Partitioning Example”.
mntpoint
Location where the RAID file system is mounted. If it is /, the RAID level must be 1 unless a boot partition (/boot) is present. If a boot partition is present, the /boot partition must be level 1 and the root (/) partition can be any of the available types. The partitions* (which denotes that multiple partitions can be listed) lists the RAID identifiers to add to the RAID array.
--level=
RAID level to use (0, 1, 4, 5, 6, or 10). TODO: xref to the section that describes raid levels
--device=
Name of the RAID device to use. As of Fedora 20, RAID devices are no longer referred to by names like md0. If you have an old (v0.90 metadata) array that you cannot assign a name to, you can specify the array by a filesystem label or UUID (for example, --device=rhel7-root --label=rhel7-root).
--spares=
Specifies the number of spare drives allocated for the RAID array. Spare drives are used to rebuild the array in case of drive failure.
--fsprofile=
Specifies a usage type to be passed to the program that makes a filesystem on this partition. A usage type defines a variety of tuning parameters to be used when making a filesystem. For this option to work, the filesystem must support the concept of usage types and there must be a configuration file that lists valid types. For ext2, ext3, ext4, this configuration file is /etc/mke2fs.conf.
--fstype=
Sets the file system type for the partition. Valid values are xfs, ext2, ext3, ext4, swap, vfat, efi and biosboot. For information about supported file systems, see TODO: xref to something about supported fs types
--fsoptions=
Specifies a free form string of options to be used when mounting the filesystem. This string will be copied into the /etc/fstab file of the installed system and should be enclosed in quotes. For example:
--fsoptions="ro, x-systemd.device-timeout=0"
--label=
Specify the label to give to the filesystem to be made. If the given label is already in use by another filesystem, a new label will be created.
--noformat
Use an existing RAID device and do not format it.
--useexisting
Use an existing RAID device and reformat it.
--encrypted
Specifies that this array should be encrypted, using the passphrase provided in the --passphrase option. If you do not specify a passphrase, Anaconda uses the default, system-wide passphrase set with the autopart --passphrase command, or stops the installation and prompts you to provide a passphrase if no default is set.
--passphrase=
Specifies the passphrase to use when encrypting this partition. You must use this option together with the --encrypted option; by itself it has no effect.
--cipher=
Specifies which type of encryption will be used if the Anaconda default aes-xts-plain64 is not satisfactory. You must use this option together with the --encrypted option; by itself it has no effect. Available types of encryption are listed in the Fedora Security Guide, available at Fedora Documentation. Using either aes-xts-plain64 or aes-cbc-essiv:sha256 is strongly recommended.
--escrowcert=URL_of_X.509_certificate
Stores data encryption keys of all encrypted volumes as files in /root, encrypted using the X.509 certificate from the URL specified with URL_of_X.509_certificate. The keys are stored as a separate file for each encrypted volume. This option is only meaningful if --encrypted is specified.
--backuppassphrase
Add a randomly-generated passphrase to each encrypted partition. Store these passphrases in separate files in /root, encrypted using the X.509 certificate specified with --escrowcert. This option is only meaningful if --escrowcert is specified.
The following example shows how to create a RAID level 1 partition for /, and a RAID level 5 for /home, assuming there are three SCSI disks on the system. It also creates three swap partitions, one on each drive.

Example A.2. Creating a RAID array in Kickstart

part raid.01 --size=6000 --ondisk=sda
part raid.02 --size=6000 --ondisk=sdb
part raid.03 --size=6000 --ondisk=sdc

part swap --size=512 --ondisk=sda
part swap --size=512 --ondisk=sdb
part swap --size=512 --ondisk=sdc

part raid.11 --size=1 --grow --ondisk=sda
part raid.12 --size=1 --grow --ondisk=sdb
part raid.13 --size=1 --grow --ondisk=sdc

raid / --level=1 --device=f20-root --label=f20-root raid.01 raid.02 raid.03
raid /home --level=5 --device=f20-home --label=f20-home raid.11 raid.12 raid.13

A.2.12. volgroup (optional) - Create LVM Volume Group

Creates a Logical Volume Management (LVM) volume group.
volgroup name partition [options]

Important

Do not use the dash (-) character in logical volume and volume group names when installing Fedora using Kickstart. If this character is used, the installation will finish normally, but the /dev/mapper/ directory will list these volumes and volume groups with every dash doubled. For example, a volume group named volgrp-01 containing a logical volume named logvol-01 will be listed as /dev/mapper/volgrp--01-logvol--01.
This limitation only applies to newly created logical volume and volume group names. If you are reusing existing ones using the --noformat or --noformat option, their names will not be changed.
For a detailed partitioning example including volgroup, see Section A.13.1, “Advanced Partitioning Example”.
--noformat
Use an existing volume group and do not format it.
--useexisting
Use an existing volume group and reformat it.
--pesize=
Set the size of the physical extents. The default size for Kickstart installations is 4 MiB.
--reserved-space=
Specify an amount of space to leave unused in a volume group in megabytes. Applicable only to newly created volume groups.
--reserved-percent=
Specify a percentage of total volume group space to leave unused. Applicable only to newly created volume groups.
Create one or more partitions first using Section A.2.10, “part (required) - Create Physical Partition”, create the logical volume group (Section A.2.12, “volgroup (optional) - Create LVM Volume Group”), and then create logical volumes. For example:
part pv.01 --size 3000
volgroup myvg pv.01
logvol / --vgname=myvg --size=2000 --name=rootvol

A.2.13. zerombr (optional) - Reinitialize Partition Tables

If zerombr is specified, any invalid partition tables found on disks are initialized. This destroys all of the contents of disks with invalid partition tables. This command is required when performing an unattended installation on a system with previously initialized disks.

Warning

On IBM System z, if zerombr is specified, any Direct Access Storage Device (DASD) visible to the installation program which is not already low-level formatted is automatically low-level formatted with dasdfmt. The command also prevents user choice during interactive installations.
If zerombr is not specified and there is at least one unformatted DASD visible to the installation program, a non-interactive Kickstart installation will exit unsuccessfully.
If zerombr is not specified and there is at least one unformatted DASD visible to the installation program, an interactive installation exits if the user does not agree to format all visible and unformatted DASDs. To circumvent this, only activate those DASDs that you will use during installation. You can always add more DASDs after installation is complete.

A.2.14. zfcp (optional) - Configure Fibre Channel Device

Define a Fibre channel device. This option only applies on IBM System z. All of the options described below must be specified.
zfcp --devnum=devnum --wwpn=wwpn --fcplun=lun
--devnum
The device number (zFCP adaptor device bus ID).
--wwpn
The device's World Wide Port Name (WWPN). Takes the form of a 16-digit number, preceded by 0x.
--fcplun
The device's Logical Unit Number (LUN). Takes the form of a 16-digit number, preceded by 0x.
For example:
zfcp --devnum=0.0.4000 --wwpn=0x5005076300C213e9 --fcplun=0x5022000000000000

A.3. Network Configuration

Commands in this chapter are used for network configuration.

A.3.1. firewall (optional) - Configure Firewall

Specify the firewall configuration for the installed system. TODO: link to the Firewall guide once we have one
firewall --enabled | --disabled device [--trust= | --ssh | --smtp | --http | --ftp | --port= | --service=]
--enabled or --enable
Reject incoming connections that are not in response to outbound requests, such as DNS replies or DHCP requests. If access to services running on this machine is needed, you can choose to allow specific services through the firewall.
--disabled or --disable
Disable the firewall.
--trust=
Listing a device here, such as em1, allows all traffic coming to and from that device to go through the firewall. To list more than one device, use this option again - for example:
firewall --enable --trust=em1 --trust=em2
Do not use a comma-separated format such as --trust em1, em2.
incoming
Replace with one or more of the following to allow the specified services through the firewall:
  • --ssh
  • --smtp
  • --http
  • --ftp
--port=
You can specify that ports be allowed through the firewall using the port:protocol format. For example, to allow IMAP access through your firewall, specify imap:tcp. Numeric ports can also be specified explicitly; for example, to allow UDP packets on port 1234 through, specify 1234:udp. To specify multiple ports, separate them by commas.
--service=
This option provides a higher-level way to allow services through the firewall. Some services (like cups, avahi, etc.) require multiple ports to be open or other special configuration in order for the service to work. You can specify each individual port with the --port option, or specify --service= and open them all at once.
Valid options are anything recognized by the firewall-offline-cmd program in the firewalld package. If firewalld is running, firewall-cmd --get-services will provide a list of known service names.

A.3.2. network (optional) - Configure Network Interfaces

Configures network information for the target system and activates network devices in the installation environment. The device specified in the first network command is activated automatically. Activation of the device can be also explicitly required by the --activate option.
--activate
If you use the --activate option on a device that has already been activated (for example, an interface you configured with boot options so that the system could retrieve the Kickstart file) the device is reactivated to use the details specified in the Kickstart file.
Use the --nodefroute option to prevent the device from using the default route.
--bootproto=
One of dhcp, bootp, ibft, or static. The default option is dhcp; the dhcp and bootp options are treated the same.
The DHCP method uses a DHCP server system to obtain its networking configuration. The BOOTP method is similar, requiring a BOOTP server to supply the networking configuration. To direct a system to use DHCP:
network --bootproto=dhcp
To direct a machine to use BOOTP to obtain its networking configuration, use the following line in the Kickstart file:
network --bootproto=bootp
To direct a machine to use the configuration specified in iBFT, use:
network --bootproto=ibft
The static method requires that you specify the IP address, netmask, gateway, and nameserver in the Kickstart file. This information is static and is used during and after the installation.
All static networking configuration information must be specified on one line; you cannot wrap lines using a backslash (\) as you can on a command line.
network --bootproto=static --ip=10.0.2.15 --netmask=255.255.255.0 --gateway=10.0.2.254 --nameserver=10.0.2.1
You can also configure multiple nameservers at the same time. To do so, specify them as a comma-delimited list in the command line.
network --bootproto=static --ip=10.0.2.15 --netmask=255.255.255.0 --gateway=10.0.2.254 --nameserver=192.168.2.1,192.168.3.1
--device=
Specifies the device to be configured (and eventually activated in Anaconda) with the network command.
If the --device= option is missing on the first use of the network command, the value of the ksdevice= Anaconda boot option is used, if available. Note that this is considered deprecated behavior; in most cases, you should always specify a --device= for every network command.
The behavior of any subsequent network command in the same Kickstart file is unspecified if its --device= option is missing. Make sure you specify this option for any network command beyond the first.
You can specify a device to be activated in any of the following ways:
  • the device name of the interface, for example, em1
  • the MAC address of the interface, for example, 01:23:45:67:89:ab
  • the keyword link, which specifies the first interface with its link in the up state
  • the keyword bootif, which uses the MAC address that pxelinux set in the BOOTIF variable. Set IPAPPEND 2 in your pxelinux.cfg file to have pxelinux set the BOOTIF variable.
For example:
network --bootproto=dhcp --device=em1
--ip=
IP address of the device.
--ipv6=
IPv6 address of the device, in the form of address[/prefix length] - for example, 3ffe:ffff:0:1::1/128 . If prefix is omitted, 64 will be used. You can also use auto for automatic configuration, or dhcp for DHCPv6-only configuration (no router advertisements).
--gateway=
Default gateway as a single IPv4 address.
--ipv6gateway=
Default gateway as a single IPv6 address.
--nodefroute
Prevents the interface being set as the default route. Use this option when you activate additional devices with the --activate= option, for example, a NIC on a separate subnet for an iSCSI target.
--nameserver=
Primary nameserver, as an IP address. Multiple nameservers must each be separated by a comma.
--nodns
Do not configure any DNS server.
--netmask=
Network mask for the installed system.
--hostname=
Hostname for the installed system.
--ethtool=
Specifies additional low-level settings for the network device which will be passed to the ethtool program.
--essid=
The network ID for wireless networks.
--wepkey=
The WEP encryption key for wireless networks.
--wpakey=
The WPA encryption key for wireless networks.
--onboot=
Whether or not to enable the device at boot time.
--dhcpclass=
The DHCP class.
--mtu=
The MTU of the device.
--noipv4
Disable IPv4 on this device.
--noipv6
Disable IPv6 on this device.
--bondslaves=
When this option is used, the network device specified in the --device= option will be created using slaves defined in the --bondslaves= option. For example:
network --device=mynetwork --bondslaves=em1,em2
The above command will create a bond device named mynetwork using the em1 and em2 interfaces as its slaves.
--bondopts=
A list of optional parameters for a bonded interface, which is specified using the --bondslaves= and --device= options. Options in this list must be separated by commas (",") or semicolons (";"). If an option itself contains a comma, use a semicolon to separate the options. For example:
network --bondopts=mode=active-backup,balance-rr;primary=eth1
Available optional parameters are listed in the Working with Kernel Modules chapter of the Fedora System Administrator's Guide, available at Fedora Documentation.

Important

The --bondopts=mode= parameter only supports full mode names such as balance-rr or broadcast, not their numerical representations such as 0 or 3.
--vlanid=
Specifies virtual LAN (VLAN) ID number (802.1q tag) for the device created using the device specified in --device= as a parent. For example, network --device=em1 --vlanid=171 will create a virtual LAN device em1.171.
--interfacename=
Specify a custom interface name for a virtual LAN device. This option should be used when the default name generated by the --vlanid= option is not desirable. This option must be used along with --vlanid=. For example:
network --device=em1 --vlanid=171 --interfacename=vlan171
The above command will create a virtual LAN interface named vlan171 on the em1 device with an ID of 171.
The interface name can be arbitrary (for example, my-vlan), but in specific cases, the following conventions must be followed:
  • If the name contains a dot (.), it must take the form of NAME.ID. The NAME is arbitrary, but the ID must be the VLAN ID. For example: em1.171 or my-vlan.171.
  • Names starting with vlan must take the form of vlanID - for example, vlan171.
--teamslaves=
Team device specified by the --device= option will be created using slaves specified in this option. Slaves are separated by commas. A slave can be followed by its configuration, which is a single-quoted JSON string with double quotes escaped by the \ character. For example:
network --teamslaves="p3p1'{\"prio\": -10, \"sticky\": true}',p3p2'{\"prio\": 100}'"
See also the --teamconfig= option.
--teamconfig=
Double-quoted team device configuration which is a single-quoted JSON string with double quotes escaped by the \ character. The device name is specified by --device= option and its slaves and their configuration by --teamslaves= option. For example:
network --device team0 --activate --bootproto static --ip=10.34.102.222 --netmask=255.255.255.0 --gateway=10.34.102.254 --nameserver=10.34.39.2 --teamslaves="p3p1'{\"prio\": -10, \"sticky\": true}',p3p2'{\"prio\": 100}'" --teamconfig="{\"runner\": {\"name\": \"activebackup\"}}"

A.4. Console and Environment

The following commands control the environment of the system after the installation finishes - language, keyboard layouts, or the graphical interface.

A.4.1. keyboard (optional) - Configure Keyboard Layouts

Sets one or more available keyboard layouts for the system.
keyboard --vckeymap= | --xlayouts= [--switch=]
--vckeymap=
Specify a VConsole keymap which should be used. Valid names correspond to the list of files in the /usr/lib/kbd/keymaps/* directory, without the .map.gz extension.
--xlayouts=
Specify a list of X layouts that should be used as a comma-separated list without spaces. Accepts values in the same format as setxkbmap(1), either in the layout format (such as cz), or in the layout (variant) format (such as cz (qwerty)).
All available layouts can be viewed on the xkeyboard-config(7) man page under Layouts.
--switch=
Specify a list of layout-switching options (shortcuts for switching between multiple keyboard layouts). Multiple options must be separated by commas without spaces. Accepts values in the same format as setxkbmap(1).
Available switching options can be viewed on the xkeyboard-config(7) man page under Options.
The following example sets up two keyboard layouts (English (US) and Czech (qwerty)) using the --xlayouts= option, and allows to switch between them using Alt+Shift:
keyboard --xlayouts=us,'cz (qwerty)' --switch=grp:alt_shift_toggle

A.4.2. lang (optional) - Configure Language During Installation

Sets the language to use during installation and the default language to use on the installed system.
lang language [--addsupport=]
The file /usr/share/system-config-language/locale-list provides a list of the valid language codes in the first column of each line and is part of the system-config-language package.
Certain languages (for example, Chinese, Japanese, Korean, and Indic languages) are not supported during text-mode installation. If you specify one of these languages with the lang command and use text mode, the installation process will continue in English, but the installed system will use your selection as its default language.
--addsupport=
Add support for additional languages. Takes the form of comma-separated list without spaces. For example:
lang en_US --addsupport=cs_CZ,de_DE,en_UK

A.4.3. services (optional) - Configure Services

Modifies the default set of services that will run under the default systemd target. The list of disabled services is processed before the list of enabled services - therefore, if a service appears on both lists, it will be enabled.
services [--disabled=list] [--enabled=list]
Do not include spaces in the list of services. If you do, Kickstart will enable or disable only the services up to the first space. For example:
services --disabled=auditd, cups,smartd, nfslock
The above will disable only the auditd service. To disable all four services, the entry should include no spaces:
services --disabled=auditd,cups,smartd,nfslock
--disabled=
Disable the services given in the comma separated list.
--enabled=
Enable the services given in the comma separated list.

A.4.4. skipx (optional) - Do Not Configure X Window System

If present, X will not be configured on the installed system.

Important

If you install a display manager among your package selection options, this package will create an X configuration, and the installed system will default to graphical.target. The effect of the skipx option will be overridden.

A.4.5. timezone (optional) - Configure Time Zone

Sets the system time zone to timezone. To view a list of available time zones, use the timedatectl list-timezones command.
timezone timezone [options]
--utc
If present, the system assumes the hardware clock is set to UTC (Greenwich Mean) time.
--nontp
Disable the NTP service automatic starting.
--ntpservers=
Specify a list of NTP servers to be used as a comma-separated list without spaces.

A.4.6. xconfig (optional) - Configure X Window System

Configures the X Window System. If you install the X Window System with a Kickstart file that does not include the xconfig command, you must provide the X configuration manually during installation.
Do not use this command in a Kickstart file that does not install the X Window System.
--defaultdesktop=
Specify either GNOME or KDE to set the default desktop (assumes that GNOME Desktop Environment and/or KDE Desktop Environment has been installed in the %packages section).
--startxonboot
Use a graphical login on the installed system.

A.5. Users, Groups and Authentication

The commands below are used to control user accounts, groups, and related areas.

A.5.1. auth or authconfig (optional) - Configure Authentication

Sets up the authentication options for the system using the authconfig command, which can also be run on a command line after the installation finishes. See the authconfig(8) manual page and the authconfig --help command for more details. Passwords are shadowed by default.
auth [--enablenis | --nisdomain= | --nisserver= | --enableshadow | --enableldap | --enableldapauth | --ldapserver= | --ldapbasedn= | --enableldaptls | --disableldaptls | --enablekrb5 | --krb5realm= | --krb5kdc= | --krb5adminserver= | --enablehesiod | --hesiodlhs= | --hesiodrhs= | --enablesmbauth | --smbservers= | --smbworkgroup= | --enablecache | --passalgo=]
--enablenis
Turns on NIS support. By default, --enablenis uses whatever domain it finds on the network. A domain should almost always be set by hand with the --nisdomain= option.
--nisdomain=
NIS domain name to use for NIS services.
--nisserver=
Server to use for NIS services (broadcasts by default).
--useshadowor --enableshadow
Use shadow passwords. Active by default.
--enableldap
Turns on LDAP support in /etc/nsswitch.conf, allowing your system to retrieve information about users (for example, their UIDs, home directories, and shells) from an LDAP directory. To use this option, you must install the nss-pam-ldapd package. You must also specify a server and a base DN (distinguished name) with --ldapserver= and --ldapbasedn=.
--enableldapauth
Use LDAP as an authentication method. This enables the pam_ldap module for authentication and changing passwords, using an LDAP directory. To use this option, you must have the nss-pam-ldapd package installed. You must also specify a server and a base DN with --ldapserver= and --ldapbasedn=. If your environment does not use TLS (Transport Layer Security), use the --disableldaptls switch to ensure that the resulting configuration file works.
--ldapserver=
If you specified either --enableldap or --enableldapauth, use this option to specify the name of the LDAP server to use. This option is set in the /etc/ldap.conf file.
--ldapbasedn=
If you specified either --enableldap or --enableldapauth, use this option to specify the DN in your LDAP directory tree under which user information is stored. This option is set in the /etc/ldap.conf file.
--enableldaptls
Use TLS (Transport Layer Security) lookups. This option allows LDAP to send encrypted usernames and passwords to an LDAP server before authentication.
--disableldaptls
Do not use TLS (Transport Layer Security) lookups in an environment that uses LDAP for authentication.
--enablekrb5
Use Kerberos 5 for authenticating users. Kerberos itself does not know about home directories, UIDs, or shells. If you enable Kerberos, you must make users' accounts known to this workstation by enabling LDAP, NIS, or Hesiod or by using the useradd command. If you use this option, you must have the pam_krb5 package installed.
--krb5realm=
The Kerberos 5 realm to which your workstation belongs.
--krb5kdc=
The KDC (or KDCs) that serve requests for the realm. If you have multiple KDCs in your realm, use a comma-separated list without spaces.
--krb5adminserver=
The KDC in your realm that is also running kadmind. This server handles password changing and other administrative requests. This server must be run on the master KDC if you have more than one KDC.
--enablehesiod
Enables Hesiod support for looking up user home directories, UIDs, and shells. More information on setting up and using Hesiod on your network is in /usr/share/doc/glibc-2.x.x/README.hesiod, which is included in the glibc package. Hesiod is an extension of DNS that uses DNS records to store information about users, groups, and various other items.
--hesiodlhs= and --hesiodrhs=
The Hesiod LHS (left-hand side) and RHS (right-hand side) values, set in /etc/hesiod.conf. The Hesiod library uses these values to search DNS for a name, similar to the way that LDAP uses a base DN.
To look up user information for the username jim, the Hesiod library looks up jim.passwdLHSRHS, which should resolve to a TXT record that contains a string identical to an entry for that user in the passwd file: jim:*:501:501:Jungle Jim:/home/jim:/bin/bash. To look up groups, the Hesiod library looks up jim.groupLHSRHS instead.
To look up users and groups by number, make 501.uid a CNAME for jim.passwd, and 501.gid a CNAME for jim.group. Note that the library does not place a period (.) in front of the LHS and RHS values when performing a search. Therefore, if the LHS and RHS values need to have a period placed in front of them, you must include the period in the values you set for --hesiodlhs= and --hesiodrhs=.
--enablesmbauth
Enables authentication of users against an SMB server (typically a Samba or Windows server). SMB authentication support does not know about home directories, UIDs, or shells. If you enable SMB, you must make users' accounts known to the workstation by enabling LDAP, NIS, or Hesiod or by using the useradd command.
--smbservers=
The name of the servers to use for SMB authentication. To specify more than one server, separate the names with commas (,).
--smbworkgroup=
The name of the workgroup for the SMB servers.
--enablecache
Enables the nscd service. The nscd service caches information about users, groups, and various other types of information. Caching is especially helpful if you choose to distribute information about users and groups over your network using NIS, LDAP, or Hesiod.
--passalgo=
Specify sha256 to set up the SHA-256 hashing algorithm or sha512 to set up the SHA-512 hashing algorithm.

A.5.2. group (optional) - Create User Group

Creates a new user group on the system. If a group with the given name or GID already exists, this command will fail. In addition, the user command can be used to create a new group for the newly created user.
group --name=name [--gid=gid]
--name=
Provides the name of the group.
--gid=
The group ID (GID). If not provided, defaults to the next available non-system GID.

A.5.3. realm (optional) - Join an Active Directory or IPA Domain

Join an Active Directory or IPA domain. For more information about this command, see the join section of the realm(8) man page.
realm join domain [options]
--computer-ou=OU=
Provide the distinguished name of an organizational unit in order to create the computer account. The exact format of the distinguished name depends on the client software and membership software. The root DSE portion of the distinguished name can usually be left out.
--no-password
Join automatically without a password.
--one-time-password=
Join using a one-time password. This is not possible with all types of realm.
--client-software=
Only join realms which can run this client software. Valid values include sssd and winbind. Not all realms support all values. By default, the client software is chosen automatically.
--server-software=
Only join realms which can run this server software. Possible values include active-directory or freeipa.
--membership-software=
Use this software when joining the realm. Valid values include samba and adcli. Not all realms support all values. By default, the membership software is chosen automatically.

A.5.4. rootpw (required) - Set Root Password

Sets the system's root password to the password argument.
rootpw [--iscrypted|--plaintext] [--lock] password
--iscrypted
If this option is present, the password argument is assumed to already be encrypted. This option is mutually exclusive with --plaintext. To create an encrypted password, you can use Python:
$ python -c 'import crypt; print(crypt.crypt("My Password", "$6$My Salt"))'
This will generate a SHA512 crypt of your password using your provided salt.
--plaintext
If this option is present, the password argument is assumed to be in plain text. This option is mutually exclusive with --iscrypted.
--lock
If this option is present, the root account is locked by default. This means that the root user will not be able to log in from the console.

A.5.5. selinux (optional) - Configure SELinux

Sets the state of SELinux on the installed system. The default policy is enforcing. For more information regarding SELinux in Fedora, see TODO: link to wherever we document SELinux now
selinux [--disabled|--enforcing|--permissive]
--enforcing
Enables SELinux with the default targeted policy being enforcing.
--permissive
Enables SELinux with the default targeted policy being permissive. This policy outputs warnings based on the SELinux policy, but does not actually enforce the policy.
--disabled
Disables SELinux completely.

A.5.6. user (optional) - Create User Account

Creates a new user on the system.
user --name=username [options]
--name=
Provides the name of the user. This option is required.
--gecos=
Provides the GECOS information for the user. This is a string of various system-specific fields separated by a comma. It is frequently used to specify the user's full name, office number, etc. See the passwd(5) man page for more details.
--groups=
In addition to the default group, a comma separated list of group names the user should belong to. The groups must exist before the user account is created. See Section A.5.2, “group (optional) - Create User Group”.
--homedir=
The home directory for the user. If not provided, this defaults to /home/username.
--lock
If this option is present, this account is locked by default. This means that the user will not be able to log in from the console.
--password=
The new user's password. If no password is provided, the account will be locked.
--password=
The new user's password. If not provided, the account will be locked by default.
--iscrypted
If this option is present, the password argument is assumed to already be encrypted. This option is mutually exclusive with --plaintext. To create an encrypted password, you can use Python:
$ python -c 'import crypt; print(crypt.crypt("My Password", "$6$My Salt"))'
This will generate a SHA512 crypt of your password using your provided salt.
--plaintext
If this option is present, the password argument is assumed to be in plain text. This option is mutually exclusive with --iscrypted.
--shell=
The user's login shell. If not provided, the system default will be used.
--uid=
The UID (User ID). If not provided, this defaults to the next available non-system UID.
--gid=
The GID (Group ID) to be used for the user's default group. If not provided, this defaults to the next available non-system group ID.

A.6. Installation Environment

The following commands control how the system will behave during the installation.

A.6.1. autostep (optional) - Go Through Every Screen

Normally, Kickstart installations skip unnecessary screens. This option makes the installation program step through every screen, displaying each briefly. This option should not be used when deploying a system because it may disrupt package installation.
autostep [--autoscreenshot]
--autoscreenshot
Take a screenshot at every step during installation and copy the images over to /tmp/anaconda-screenshots after installation is complete. This is useful for documentation.

A.6.2. cmdline (optional) - Perform Installation in Command Line Mode

Perform the installation in a completely non-interactive command line mode. Any prompts for interaction halts the install. This mode is useful on IBM System z systems with the x3270 terminal. The recommended use is in conjunction with the RUNKS=1 and inst.ks= parameters.

A.6.3. graphical (optional) - Perform Installation in Graphical Mode

Perform the installation in graphical mode. This is the default. This command takes no options.

A.6.4. logging (optional) - Configure Error Logging During Installation

Controls the error logging of Anaconda during installation. It has no effect on the installed system.
logging [--host= | --port= | --level=]
--host=
Send logging information to the given remote host, which must be running a syslogd process configured to accept remote logging.
--port=
If the remote syslogd process uses a port other than the default, it may be specified with this option.
--level=
Specify the minimum level of messages that appear on virtual console 3 (tty3). This only affects messages printed to the console; log files will contain messages of all levels. Possible values are debug, info, warning, error, or critical.

A.6.5. rescue (optional) - Rescue Mode

Automatically enters the installation program's rescue mode. This gives you a chance to repair the system in case of any problems.
rescue [--nomount|--romount]
--nomount or --romount
Controls how the installed system is mounted in the rescue environment. By default, the installation program will find your system and mount it in read-write mode, telling you where it has performed this mount. You may optionally choose to not mount anything (the --nomount option) or mount in read-only mode (the --romount option). Only one of these two options may be used.

A.6.6. sshpw (optional) - Restrict ssh Access During Installation

During the installation, you can interact with the installation program and monitor its progress over an SSH connection. Use the sshpw command to create temporary accounts through which to log on. Each instance of the command creates a separate account that exists only in the installation environment. These accounts are not transferred to the installed system.
sshpw --username=name password [--iscrypted|--plaintext] [--lock]

Important

By default, the ssh server is not started during the installation. To make ssh available during the installation, boot the system with the kernel boot option inst.sshd. See Section 8.2.3, “Console, Environment and Display Options” for details.

Note

If you want to disable root ssh access to your hardware during installation, use the following:
sshpw --username=root --lock
--username
Provides the name of the user. This option is required.
--iscrypted
If this option is present, the password argument is assumed to already be encrypted. This option is mutually exclusive with --plaintext. To create an encrypted password, you can use Python:
$ python -c 'import crypt; print(crypt.crypt("My Password", "$6$My Salt"))'
This will generate a SHA512 crypt of your password using your provided salt.
--plaintext
If this option is present, the password argument is assumed to be in plain text. This option is mutually exclusive with --iscrypted
--lock
If this option is present, this account is locked by default. This means that the user will not be able to log in from the console.

A.6.7. text (optional) - Perform Installation in Text Mode

Perform the Kickstart installation in text mode. Kickstart installations are performed in graphical mode by default.

A.6.8. unsupported_hardware (optional) - Suppress Unsupported Hardware Alerts

Suppress the Unsupported Hardware Detected alert. If this command is not included and unsupported hardware is detected, the installation will stall at this alert.

A.6.9. vnc (optional) - Configure VNC Access

Allows the graphical installation to be viewed remotely via VNC. This method is usually preferred over text mode, as there are some size and language limitations in text installations. With no additional options, this command will start a VNC server on the installation system with no password and will display the details required to connect to it.
vnc [--host=hostname] [--port=port] [--password=password]
For more information about VNC installations, including instructions on how to connect to the installation system, see Chapter 11, Installing Using VNC.
--host=
Connect to a VNC viewer listening on the given hostname.
--port=
Provide a port that the remote VNC viewer process is listening on. If not provided, the VNC default (5900) will be used.
--password=
Set a password which must be provided to connect to the VNC session. This is optional, but recommended.

A.7. After the Installation

This section contains commands which control the system's behavior immediately after the installation finishes.

A.7.1. eula (optional) - Accept the License Agreement

Use this option to accept the End User License Agreement (EULA) without user interaction. Specifying this option prevents Initial Setup from prompting you to accept the license agreement after you finish the installation and reboot the system for the first time. See Section 5.1, “Initial Setup” for more information.
--agreed
Accept the EULA. This option must always be used, otherwise the eula command is meaningless. TODO: Does this even make sense on Fedora? Does initial-setup have an EULA in it?

A.7.2. firstboot (optional) - Enable or Disable Initial Setup

Determine whether the Initial Setup application starts the first time the system is booted. If enabled, the initial-setup package must be installed. If not specified, this option is disabled by default. For more information about Initial Setup, see Section 5.1, “Initial Setup”.
firstboot --enable|--disable [--reconfig]
--enable or --enabled
Initial Setup will be started the first time the installed system boots.
--disable or --disabled
Initial Setup will be disabled.
--reconfig
Initial Setup will start after the reboot in reconfiguration mode. This mode enables the language, mouse, keyboard, root password, security level, time zone and networking configuration options in addition to the default ones.

A.7.3. halt (optional) - Halt System After Installation

Halt the system after the installation has successfully completed. This is similar to a manual installation, where after the installation finishes, the installer displays a message and waits for the user to press a key before rebooting. During a Kickstart installation, if no completion method is specified, this option is used as the default.
For other completion methods, see the poweroff, reboot, and shutdown commands.

A.7.4. poweroff (optional) - Power Off After Installation

Shut down and power off the system after the installation has successfully completed.

Note

The poweroff command is highly dependent on the system hardware in use. Specifically, certain hardware components such as the BIOS, APM (advanced power management), and ACPI (advanced configuration and power interface) must be able to interact with the system kernel. Consult your hardware documentation for more information on you system's APM/ACPI abilities.
For other completion methods, see the halt, reboot, and shutdown Kickstart commands.

A.7.5. reboot (optional) - Reboot After Installation

Reboot after the installation is successfully completed. If you are installing Fedora on IBM System z in command line mode (using Section A.6.2, “cmdline (optional) - Perform Installation in Command Line Mode”), this command is necessary for a fully automated installation.
For other completion methods, see the halt, poweroff, and shutdown Kickstart options.

Important

Use of the reboot command may result in an endless installation loop, depending on the installation media and method.
--eject
Attempt to eject the installation media (if installing from a DVD) before rebooting.

A.7.6. shutdown (optional) - Shut Down After Installation

Shut down the system after the installation has successfully completed.
For other completion methods, see the halt, poweroff, and reboot Kickstart options.

A.8. %include (optional) - Include Contents of Another File

Use the %include /path/to/file command to include the contents of another file in the Kickstart file as though the contents were at the location of the %include command in the Kickstart file.

A.9. %ksappend (optional) - Append Contents of Another File

The %ksappend url directive is very similar to Section A.8, “%include (optional) - Include Contents of Another File” in that it is used to include the contents of additional files as though they were at the location of the %ksappend command. The difference is in when the two directives are processed.
%ksappend is processed in an initial pass, before any other part of the Kickstart file. Then, this expanded Kickstart file is passed to the rest of Anaconda where all %pre scripts are handled, and then finally the rest of the Kickstart file is processed in order, which includes %include directives.
Therefore, %ksappend provides a way to include a file containing %pre scripts, while %include does not.

A.10. %packages (required) - Package Selection

Use the %packages command to begin a Kickstart section which describes the software packages to be installed. This section must end with an %end statement.
You can specify packages by environment, group, or by their package names. Several environments and groups that contain related packages are defined. See the repodata/*-comps-variant.architecture.xml file TODO: where's comps.xml?
The *-comps-variant.architecture.xml file contains a structure describing available environments (marked by the <environment> tag) and groups (the <group> tag). Each entry has an ID, user visibility value, name, description, and package list. If the group is selected for installation, the packages marked mandatory in the package list are always installed, the packages marked default are installed if they are not specifically excluded, and the packages marked optional must be specifically included even when the group is selected.
You can specify a package group or environment using either its ID (the <id> tag) or name (the <name> tag).

Important

To install a 32-bit package on a 64-bit system, you will need to append the package name with the 32-bit architecture for which the package was built - for example, glibc.i686. The --multilib option also must be specified in the Kickstart file; see the available options below.

Important

Initial Setup does not run after a system is installed from a Kickstart file unless a desktop environment and the X Window System were included in the installation and graphical login was enabled. This means that by default, no users except for root will be created. You can either create a user with the user option in the Kickstart file before installing additional systems from it (see Section A.5.6, “user (optional) - Create User Account” for details) or log into the installed system with a virtual console as root and add users with the useradd command.

Specifying Environments, Groups and Packages

Specifying an Environment
In addition to groups, you specify an entire environment to be installed:
%packages
@^Infrastructure Server
%end
This command will install all packages which are part of the Infrastracture Server environment. All available environments are described in the repodata/*-comps-variant.architecture.xml file.
Specifying Groups
Specify groups, one entry to a line, starting with an @ symbol, and then the full group name or group id as given in the *-comps-variant.architecture.xml file. For example:
%packages 
@X Window System
@Desktop
@Sound and Video
%end
The Core and Base groups are always selected - it is not necessary to specify them in the %packages section.
The *-comps-variant.architecture.xml file also defines groups called Conflicts (variant) for each variant of Fedora. This group contains all packages which are known to cause file conflicts, and is intended to be excluded.
Specifying Individual Packages
Specify individual packages by name, one entry to a line. You can use the asterisk character (*) as a wildcard in package names. For example:
%packages 
sqlite
curl
aspell
docbook*
%end
The docbook* entry includes the packages docbook-dtds, docbook-simple, docbook-slides and others that match the pattern represented with the wildcard.
Excluding Environments, Groups, or Packages
Use a leading dash (-) to specify packages or groups to exclude from the installation. For example:
%packages 
-@Graphical Internet 
-autofs
-ipa*fonts
%end

Important

Installing all available packages using only * in a Kickstart file is not supported, even if you exclude the @Conflicts (variant) group.
You can change the default behavior of the %packages section by using several options. Some options work for the entire package selection, others are used with only specific groups.

Common Package Selection Options

The following options are available for the %packages. To use an option, append it to the start of the package selection section. For example:
%packages --multilib --ignoremissing
--nobase
Do not install the @Base group. Use this option to perform a minimal installation, for example, for a single-purpose server or desktop appliance.
--ignoremissing
Ignore any packages, groups and environments missing in the installation source, instead of halting the installation to ask if the installation should be aborted or continued.
--excludedocs
Do not install any documentation contained within packages. In most cases, this will exclude any files normally installed in the /usr/share/doc* directory, but the specific files to be excluded depend on individual packages.
--multilib
Configure the installed system for multilib packages (that is, to allow installing 32-bit packages on a 64-bit system) and install packages specified in this section as such.
Normally, on a 64-bit system, only packages for this architecture (marked as x86_64) and packages for all architectures (marked as noarch) would be installed. When you use this option, packages for 32-bit systems (marked as i686) will be automatically installed as well, if available.
This only applies to packages explicitly specified in the %packages section. Packages which are only being installed as dependencies without being specified in the Kickstart file will only be installed in architecture versions in which they are needed, even if they are available for more architectures.

Options for Specific Package Groups

The options in this list only apply to a single package group. Instead of using them at the %packages command in the Kickstart file, append them to the group name. For example:
%packages
@Graphical Internet --optional
%end
--nodefaults
Only install the group's mandatory packages, not the default selections.
--optional
Install packages marked as optional in the group definition in the *-comps-variant.architecture.xml file, in addition to installing the default selections.

A.11. %pre (optional) - Pre-installation Script

You can add commands to run on the system immediately after the Kickstart file has been parsed, but before the installation begins. This section must be placed towards the end of the Kickstart file, after the actual Kickstart commands, and must start with %pre and end with %end. If your Kickstart file also includes a %post section, the order in which the %pre and %post sections are included does not matter.
You can access the network in the %pre section. However, the name service has not been configured at this point, so only IP addresses work, not URLs.
The pre-installation script section of Kickstart cannot manage multiple install trees or source media. This information must be included for each created Kickstart file, as the pre-installation script occurs during the second stage of the installation process.

Note

Unlike the post-installation script, the pre-installation script is not run in the chroot environment.
The following options can be used to change the behavior of pre-installation scripts. To use an option, append it to the %pre line at the beginning of the script. For example:
%pre --interpreter=/usr/bin/python
--- Python script omitted --
%end
--interpreter=
Allows you to specify a different scripting language, such as Python. Any scripting language available on the system can be used; in most cases, these will be /usr/bin/sh, /usr/bin/bash, and /usr/bin/python.
--erroronfail
Display an error and halt the installation if the script fails. The error message will direct you to where the cause of the failure is logged.
--log=
Logs the script's output into the specified log file. For example:
%pre --log=/mnt/sysimage/root/ks-pre.log
For an example of a pre-installation script, see Section A.13.2, “Example Pre-installation Script”.

A.12. %post (optional) - Post-installation Script

You have the option of adding commands to run on the system once the installation is complete, but before the system is rebooted for the first time. This section must be placed towards the end of the Kickstart file, after the actual Kickstart commands, and must start with %post and end with %end. If your Kickstart file also includes a %pre section, the order of the %pre and %post sections does not matter.
This section is useful for functions such as installing additional software or configuring an additional name server. The post-install script is run in a chroot environment, therefore, performing tasks such as copying scripts or RPM packages from the installation media do not work by default. You can change this behavior using the --nochroot option as described below.

Important

If you configured the network with static IP information, including a name server, you can access the network and resolve IP addresses in the %post section. If you configured the network for DHCP, the /etc/resolv.conf file has not been completed when the installation executes the %post section. You can access the network, but you cannot resolve IP addresses. Thus, if you are using DHCP, you must specify IP addresses in the %post section.
The following options can be used to change the behavior of post-installation scripts. To use an option, append it to the %post line at the beginning of the script. For example:
%post --interpreter=/usr/bin/python
--- Python script omitted --
%end
--interpreter=
Allows you to specify a different scripting language, such as Python. For example:
%post --interpreter=/usr/bin/python
Any scripting language available on the system can be used; in most cases, these will be /usr/bin/sh, /usr/bin/bash, and /usr/bin/python.
--nochroot
Allows you to specify commands that you would like to run outside of the chroot environment.
The following example copies the file /etc/resolv.conf to the file system that was just installed.
%post --nochroot
cp /etc/resolv.conf /mnt/sysimage/etc/resolv.conf
%end
--erroronfail
Display an error and halt the installation if the script fails. The error message will direct you to where the cause of the failure is logged.
--log=
Logs the script's output into the specified log file. Note that the path of the log file must take into account whether or not you use the --nochroot option. For example, without --nochroot:
%post --log=/root/ks-post.log
with --nochroot:
%post --nochroot --log=/mnt/sysimage/root/ks-post.log
For an example of a post-installation script, see Section A.13.3, “Example Post-installation Script”.

A.13. Example Kickstart Configurations

A.13.1. Advanced Partitioning Example

The following is an integrated example showing the clearpart, zerombr, part, raid, volgroup, and logvol Kickstart options in action:

Example A.3. Advanced Partitioning Example

clearpart --drives=hda,hdc
zerombr
# Raid 1 IDE config 
part raid.11 --size 1000 --asprimary --ondrive=hda 
part raid.12 --size 1000 --asprimary --ondrive=hda
part raid.13 --size 2000 --asprimary --ondrive=hda
part raid.14 --size 8000 --ondrive=hda
part raid.15 --size 16384 --grow --ondrive=hda   
part raid.21 --size 1000 --asprimary --ondrive=hdc
part raid.22 --size 1000 --asprimary --ondrive=hdc
part raid.23 --size 2000 --asprimary --ondrive=hdc
part raid.24 --size 8000 --ondrive=hdc
part raid.25 --size 16384 --grow --ondrive=hdc

# You can add --spares=x  
raid / --fstype xfs --device root --level=RAID1 raid.11 raid.21
raid /safe --fstype xfs --device safe --level=RAID1 raid.12 raid.22
raid swap --fstype swap --device swap --level=RAID1 raid.13 raid.23
raid /usr --fstype xfs --device usr --level=RAID1 raid.14 raid.24
raid pv.01 --fstype xfs --device pv.01 --level=RAID1 raid.15 raid.25

# LVM configuration so that we can resize /var and /usr/local later
volgroup sysvg pv.01
logvol /var --vgname=sysvg --size=8000 --name=var 
logvol /var/freespace --vgname=sysvg --size=8000 --name=freespacetouse
logvol /usr/local --vgname=sysvg --size=1 --grow --name=usrlocal
This advanced example implements LVM over RAID, as well as the ability to resize various directories for future growth.
First, the clearpart command is used on drives hda and hdc to wipe them. The zerombr command initializes unused partition tables.
Then, the two drives are partitioned to prepare them for RAID configuration. Each drive is divided into five partitions, and each drive is partitioned into an identical layout.
The next part uses these pairs of physical partitions to create a software RAID device with RAID1 level (mirroring). The first four RAID devices are used for / (root), /safe, swap and /usr. The fifth, largest pair of partitions is named pv.01 and will be used in the following part as a physical volume for LVM.
Finally, the last set of commands first creates a volume group named sysvg on the pv.01 physical volume. Then, three logical volumes (/var, /var/freespace and /usr/local) are created and added to the sysvg volume group. The /var and /var/freespace volumes have a set size of 8 GB, and the /usr/local volume uses the --grow option to fill all remaining available space.

Important

The above example uses identifiers hda and hdc to identify disk drives. You should use unique identifiers, such as a disk labels or an UUIDs, to identify disk drives. See the note in introduction to this appendix.

A.13.2. Example Pre-installation Script

The following is an example %pre section:

Example A.4. Sample %pre Script

%pre
#!/bin/sh
hds=""
mymedia=""
for file in /proc/ide/h* do
    mymedia=`cat $file/media`
    if [ $mymedia == "disk" ] ; then
        hds="$hds `basename $file`"
    fi
done 
set $hds
numhd=`echo $#`
drive1=`echo $hds | cut -d' ' -f1`
drive2=`echo $hds | cut -d' ' -f2`

#Write out partition scheme based on whether there are 1 or 2 hard drives  
if [ $numhd == "2" ] ; then
    #2 drives
    echo "#partitioning scheme generated in %pre for 2 drives" > /tmp/part-include
    echo "clearpart --all" >> /tmp/part-include
    echo "part /boot --fstype xfs --size 75 --ondisk hda" >> /tmp/part-include
    echo "part / --fstype xfs --size 1 --grow --ondisk hda" >> /tmp/part-include
    echo "part swap --recommended --ondisk $drive1" >> /tmp/part-include
    echo "part /home --fstype xfs --size 1 --grow --ondisk hdb" >> /tmp/part-include
else
    #1 drive
    echo "#partitioning scheme generated in %pre for 1 drive" > /tmp/part-include
    echo "clearpart --all" >> /tmp/part-include
    echo "part /boot --fstype xfs --size 75" >> /tmp/part-include
    echo "part swap --recommended" >> /tmp/part-include
    echo "part / --fstype xfs --size 2048" >> /tmp/part-include
    echo "part /home --fstype xfs --size 2048 --grow" >> /tmp/part-include
fi
%end
This script determines the number of hard drives in the system and writes a text file with a different partitioning scheme depending on whether it has one or two drives. Instead of having a set of partitioning commands in the Kickstart file, include the following line:
%include /tmp/part-include
The partitioning commands selected in the script will be used.

A.13.3. Example Post-installation Script

The following is an example %post section:

Example A.5. Sample %post Script

# Start of the %post section with logging into /root/ks-post.log
%post --log=/root/ks-post.log

# Mount an NFS share
mkdir /mnt/temp
mount -o nolock 10.10.0.2:/usr/new-machines /mnt/temp
openvt -s -w -- /mnt/temp/runme
umount /mnt/temp

# End of the %post section
%end
The above example mounts an NFS share and executes a script named runme located at /usr/new-machines/ on the share. Note that NFS file locking is not supported while in Kickstart mode, therefore the -o nolock option is required.

Revision History

Note that revision numbers relate to the edition of this manual, not to version numbers of Fedora.

Revision History
Revision 1.0-0Tue Dec 17 2013Petr Bokoč
Publishing for Fedora 20

Index

F

feedback
contact information for this manual, We Need Feedback!